
Carry water, food, flat repair tools, a multitool, and emergency basics on most mountain bike rides. Add layers, lights, or extra repair gear when the trail is longer, colder, wetter, or more remote.
On most mountain bike rides, carry the basics that let you stay hydrated, fix a flat, make small trail-side adjustments, and get home safely. That usually means water, snacks, a repair kit, a multitool, a phone, ID, and a few weather- or route-specific extras.
- Essentials first: Water, snacks, repair tools, and ID cover most rides.
- Match the route: Remote or long trails need more self-sufficiency.
- Check compatibility: Tubeless setups and multitools must fit your bike.
- Choose a carry system wisely: Backpack, hip pack, and frame storage each have tradeoffs.
- Inspect before leaving: Small checks help prevent avoidable trail problems.
What Should You Carry on a Mountain Bike Ride? The Short Answer
The right carry list depends on how far you’re riding, how remote the trail is, and whether you’re going solo or with friends. A good rule is simple: bring enough to handle the most likely problems without turning your pack into dead weight.
How to Build a Mountain Bike Carry Kit for 2026
Think of your carry kit in layers. Start with essentials you want on every ride, then add items based on distance, weather, and how far you’ll be from help. This keeps the kit practical instead of overloaded.
Trail length, terrain, and weather: what changes your list
Short, smooth local loops need less than long backcountry climbs or rocky descents. Rough terrain increases the chance of tire issues, loose bolts, or minor crashes, while hot, cold, wet, or windy conditions change how much water, clothing, and safety gear you should bring.
If the route is unfamiliar, assume it will take longer than expected and pack for the slower pace, not the fastest version of the ride.
Solo rides vs. group rides: how risk changes what you pack
When you ride alone, self-sufficiency matters more. You may want extra repair items, more water, and a slightly larger first-aid kit because nobody else is there to share tools or help with a mechanical problem.
In a group, you can sometimes split gear, but don’t assume someone else has the exact tool or tube you need. It’s still smart to carry your own essentials.
Day rides, enduro laps, and backcountry routes: different carry priorities
Day rides usually call for the standard kit plus enough food and water to cover the full outing. Enduro laps often favor a lighter, compact setup that stays secure on rough descents. Backcountry routes need the most conservative approach because distance, weather, and limited access to help can turn a small issue into a bigger one.
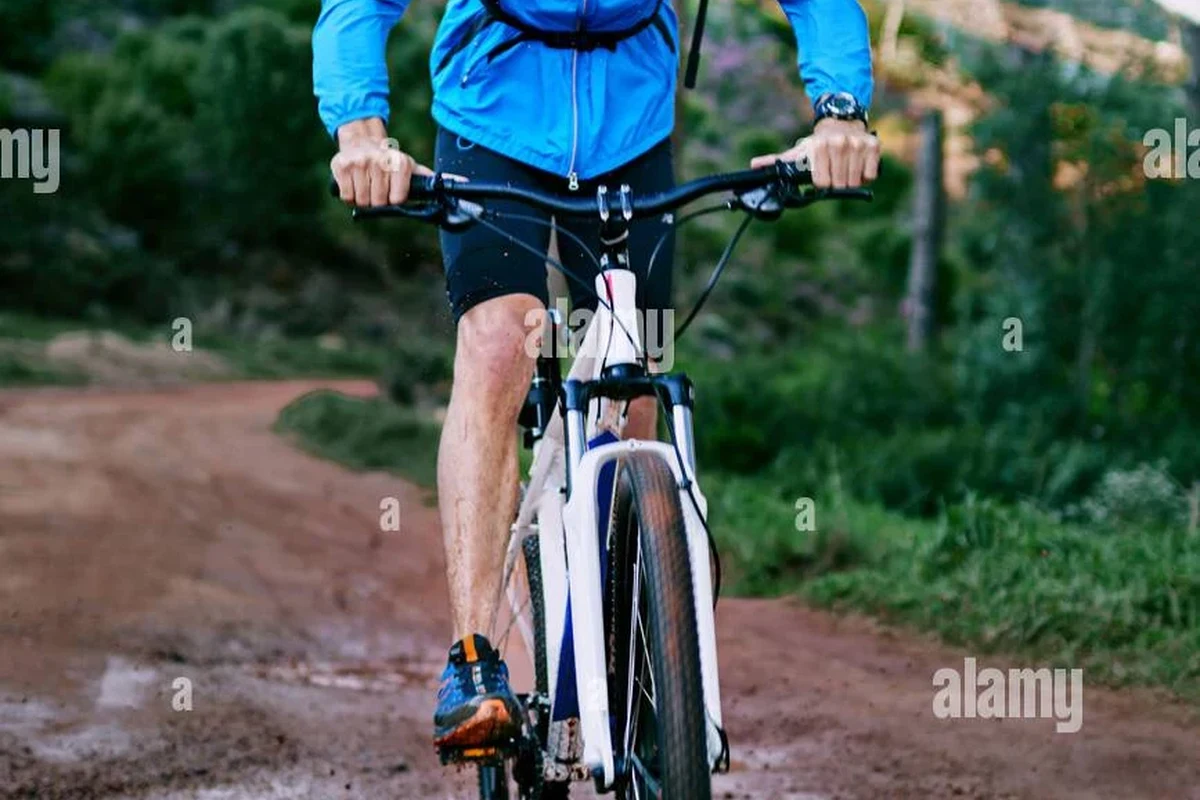
The Core Items Every Mountain Biker Should Carry
These are the items that solve the most common trail problems. The exact format can vary by rider and bike, but the categories stay the same.
Hydration: bottles, hydration packs, and how much to bring
Bring a water bottle, a hydration pack, or both, depending on trail length and heat. Bottles are simple and easy to refill, while packs can carry more water and keep it accessible on longer rides. How much you need depends on weather, effort, and personal needs, so check your route and plan conservatively.
Hydration pack capacity, bottle cage compatibility, and hose routing vary by bike frame and pack design. Confirm fit before relying on a new setup for a long ride.
Nutrition: simple fuel choices that work on trail
Carry easy-to-eat foods that won’t make a mess or require much prep. Common choices include bars, chews, bananas, sandwiches, or other compact snacks that fit your stomach and your ride length.
For longer rides, pack more than you think you need. Fatigue often shows up after you’ve already burned through your first round of snacks.
Flat repair: tube, tire plugs, tire levers, pump, and CO2
Flat repair is one of the most important carry categories on a mountain bike ride. A typical kit may include a spare tube, tire plugs for tubeless setups, tire levers, a mini pump, and optionally CO2 inflators if you know how to use them.
- Match your repair kit to your tire setup before the ride.
- Carry a pump even if you bring CO2, since CO2 is not a complete backup plan on every ride.
- Assuming a tubeless bike never needs a tube.
- Bringing tools that do not fit your valve type or wheel setup.
Multi-tool essentials: hex keys, Torx bits, and chain tools
A good multitool should cover the fasteners on your bike, which often means common hex sizes and at least one Torx bit on many modern bikes. A chain tool or quick-link pliers can be useful on longer rides, but only if your drivetrain uses compatible parts.
Emergency basics: ID, phone, cash, and a small first-aid kit
Carry identification, a charged phone, and a bit of cash or a card if your route passes through towns or trailheads with services. A small first-aid kit with bandages, gauze, antiseptic wipes, and any personal medications can help with minor issues until you get back.
If you have a medical condition, recent injury, or a history of severe reactions, talk with a qualified professional about what emergency items you should carry and when you should avoid riding alone.
Safety Gear and Protection: What Matters Most
Protective gear can reduce exposure to trail hazards, but it cannot guarantee protection. Fit, coverage, and condition matter more than marketing language.
Helmet fit, coverage, and standards to verify
Wear a helmet that fits securely and follows the manufacturer’s fit instructions. For mountain biking, many riders prefer more rear coverage or trail-specific designs, but the right choice depends on terrain and comfort.
Before buying, verify the current certification or safety standard listed by the manufacturer and check whether it matches your riding style and local event rules. If you are unsure, consult the official product manual and the brand’s size guide.
Gloves, knee pads, and eye protection: comfort vs. protection
Gloves can improve grip and reduce hand discomfort, while knee pads and eye protection can add confidence on technical trails. The tradeoff is heat, bulk, and reduced freedom of movement, so choose protection that you will actually wear consistently.
- Try protective gear with your riding position in mind, not just standing still.
- Make sure eyewear does not interfere with helmet fit or ventilation.
- Choose pads that stay put without cutting off circulation or restricting pedaling.
Inspection and replacement guidance for helmets and pads
Inspect gear regularly for cracks, deep scuffs, broken straps, worn padding, loose buckles, or signs of impact. Follow the manufacturer’s replacement guidance after a crash or when the gear shows damage or age-related wear.
Stop using damaged safety gear and follow the manufacturer’s inspection, care, and replacement guidance before the next ride.
The limits of protective gear on technical trails
Gear helps, but it does not make a difficult trail safe in every situation. Trail choice, speed control, line selection, and fatigue management still matter more than any single piece of equipment.
How to Choose the Right Carry System
Your carry system should keep essentials secure, easy to reach, and comfortable over rough ground. The best option depends on how much you carry and how sensitive you are to heat and bounce.
Backpack vs. hip pack vs. frame storage
Backpacks usually offer the most room and can hold a hydration bladder, extra layers, and repair gear. Hip packs sit lower and can feel cooler, while frame storage keeps weight on the bike and frees up your back. None is perfect for every rider.
| Option | Best For | Key Consideration |
|---|---|---|
| Backpack | Long rides, extra layers, more water | Can run hotter on the back |
| Hip pack | Shorter rides, lighter carry, better ventilation | Limited capacity |
| Frame storage | Weight savings and clean setup | Compatibility with frame space and bottle mounts |
Weight distribution, comfort, and heat management
Heavy items should sit as close to your body or bike frame as practical to reduce bounce. In warm weather, a lighter carry setup can improve comfort, but only if it still includes the essentials you may need on the trail.
Storage capacity, accessibility, and compatibility with your bike
Make sure the system can fit your water choice, repair tools, and any extra layers without forcing zippers or straps closed. Compatibility matters if your frame has limited space, a small front triangle, or unusual bottle cage placement.
What to look for in straps, zippers, bottles, and bladder sleeves
Look for secure straps, smooth zippers, and storage that keeps items from rattling around. If you use a bladder, check hose routing and bite valve placement so drinking is easy while riding. For bottles, confirm cage clearance and retention on rough trails.
What to Carry by Ride Type and Conditions
Once the core kit is covered, adjust for the day’s actual conditions. This is where many riders either overpack or leave out something important.
Short local rides: minimal kit for fast spins
For short rides close to home or the trailhead, a minimal kit often works best: water, phone, ID, a small multitool, and a basic flat repair setup. If the loop is very short and you are near help, you may not need much more.
Long rides and remote trails: extra repair and survival items
Long or remote rides justify extra caution. Consider a larger first-aid kit, more food, a light layer, a backup light, and a more complete repair setup. If a route has limited cell service or long exits, self-sufficiency matters more than speed.
Wet, cold, or hot-weather additions
In wet weather, bring a packable shell, dry socks if space allows, and a way to protect electronics. In cold weather, add insulation, gloves, and enough food to avoid getting chilled. In hot weather, increase water and electrolytes as needed and consider sun protection.
Cold weather can make hydration and nutrition feel less urgent, but riders often still need both to stay steady and focused on the trail.
Night riding and low-visibility essentials
If you ride near dusk or after dark, bring a reliable light setup and reflective or high-visibility details where appropriate. Check battery life before leaving, and do not assume a daylight ride will finish in daylight.
Common Mistakes Mountain Bikers Make When Packing
Most packing mistakes are not about forgetting everything. They are about carrying the wrong things, in the wrong format, for the wrong ride.
Overpacking and carrying unnecessary weight
Too much gear can make the bike feel sluggish and the ride less enjoyable. If you do not know why an item is in your pack, remove it and see whether the ride still feels prepared.
Forgetting compatibility checks for tubeless setups and tools
Many repair problems come from mismatched gear. Tubeless riders should confirm plug tools, valves, sealant access, and backup tube fit, while riders with newer drivetrains should verify the right bits and chain tools.
Poor storage habits that damage gear or slow repairs
Loose items can wear through fabric, rattle, or become hard to find when you need them. Keep small parts in organized sleeves or pouches, and store wet gear separately when possible.
Skipping regular inspection before every ride
Before you roll out, check tire pressure, brake feel, quick releases or thru-axles, pack straps, battery levels for lights, and the condition of your repair tools. A few minutes of inspection can prevent a lot of frustration later.
- Carry hydration, food, flat repair, a multitool, and emergency basics on most rides.
- Add more water, layers, and repair support as distance and remoteness increase.
- Choose a carry system that fits your bike, your weather, and how much you actually need.
Final Recommendation: The Best Practical Carry Setup for Most Riders
For most mountain bikers, the best setup is a compact kit that covers hydration, nutrition, flat repair, a multitool, phone, ID, and a small first-aid kit. From there, add weather protection, extra fuel, or a backup light only when the ride truly calls for it.
A balanced starter kit for beginners
Beginners usually do best with a simple pack or hip pack that holds water, a tube or plugs, a pump, a basic multitool, and a few trail snacks. That setup is easy to understand, easy to inspect, and flexible enough for most local rides.
A more advanced kit for technical or remote riding
Riders tackling technical or remote routes may need a larger hydration capacity, more repair options, a first-aid kit, a light layer, and a backup light. The goal is not to carry everything possible, but to carry enough to solve realistic problems without relying on luck.
Bottom line: pack for self-sufficiency without overloading
If you want one simple answer, carry enough to handle a flat, a short delay, and a safe return. Then adjust your kit based on terrain, weather, and how far you are from help.
Common Questions
Water is usually the first priority, followed by a way to fix a flat and make basic adjustments. After that, add food, a phone, and ID.
It’s a good idea, even if the kit is small. For very short local rides, a compact version may be enough.
Some riders do, but a spare tube is still a smart backup. Tubeless systems can fail in ways that sealant or plugs cannot solve.
Neither is always better. Hydration packs carry more and work well on long rides, while bottles are simpler and often cooler for shorter rides.
Add a warm layer, gloves, and enough food and water for slower riding. Cold weather can make small delays feel much bigger.
Frequently Asked Questions
Most riders should carry water, food, a flat repair kit, a multitool, a phone, and ID. A small first-aid kit is also smart, especially if you ride alone or far from help.
Yes, many riders still bring a spare tube as backup. Tubeless setups are useful, but they do not remove every tire problem.
Pick a backpack if you need more water, layers, or repair gear. Choose a hip pack if you want lighter storage and better heat management on shorter rides.
Add extra water, more food, a light layer, and more complete repair options. If cell service is unreliable, plan for slower progress and fewer outside resources.
A properly fitting helmet is the starting point, and gloves, eye protection, and knee pads may be helpful depending on terrain and comfort. Protective gear helps, but it cannot guarantee protection.
Check your bike, pack, and protective gear before every ride. Look for damage, loose straps, low tire pressure, and any tool or battery issues that could affect the ride.
