
For most first-time mountain bikers, a trail helmet with the right fit and a verified safety standard is the best starting point. Choose a more protective style only if your terrain and speed justify the extra coverage.
If you’re buying your first mountain bike helmet, start with fit, coverage, and a current safety standard—not style alone. For most first-time riders, a well-fitting trail or all-mountain helmet is the best balance of protection, comfort, and everyday usability.
- Fit first: A correctly sized helmet matters more than extra features or a higher price.
- Choose by terrain: Trail helmets suit most beginners; full-face models fit higher-risk riding.
- Verify standards: Check the current safety label and the manufacturer’s intended use.
- Comfort affects use: Ventilation, eyewear compatibility, and weight influence whether you wear it consistently.
Mountain Bike Helmet Buying Guide for First-Time Riders: What to Look for in 2025
Choosing a helmet is less about finding the “best” model and more about finding the right match for your head shape, riding terrain, and comfort needs. In 2025, the smartest first purchase is usually a helmet that fits securely, meets recognized safety standards, and feels comfortable enough that you’ll actually wear it every ride.
For first-time riders, the best helmet is the one you can size correctly, wear consistently, and trust for the kind of trails you plan to ride.
Before comparing colors, vents, or brand names, focus on three things: coverage, fit, and verified safety labeling. If a helmet misses any of those, it is not a good value no matter how appealing it looks online.
How a Mountain Bike Helmet Protects You on the Trail
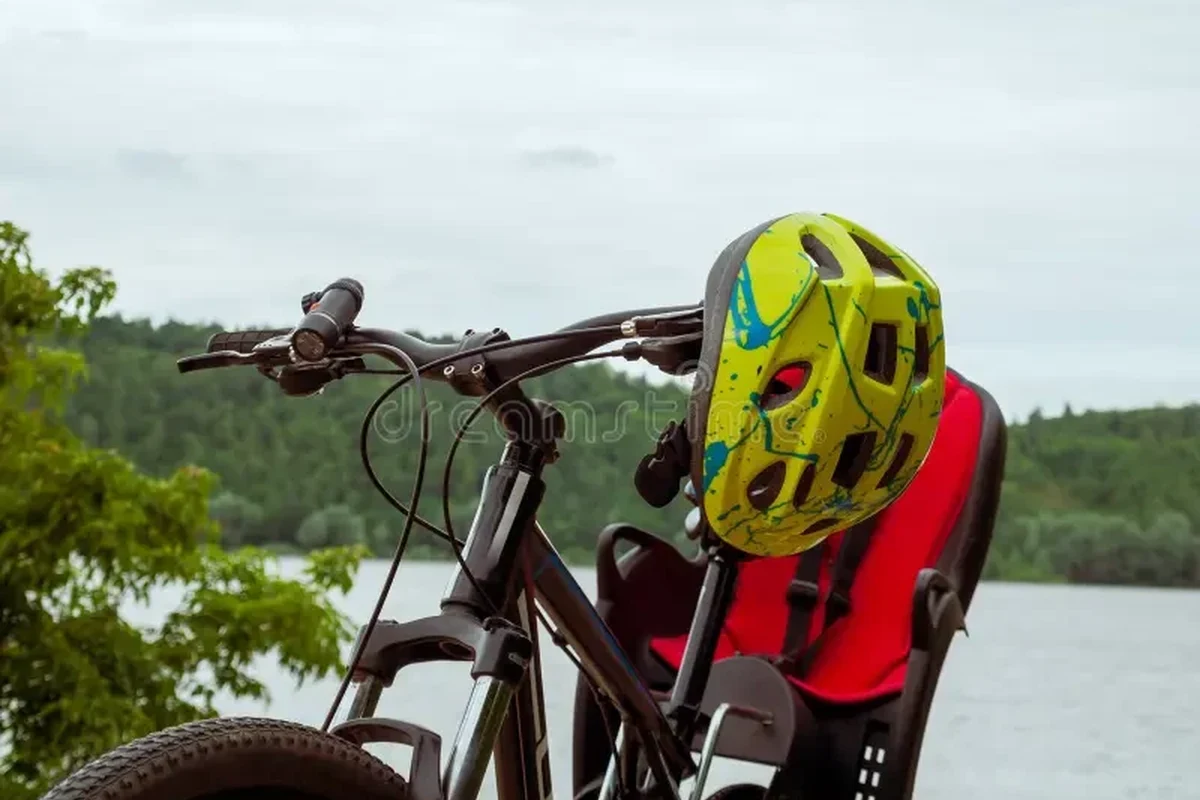
Mountain bike helmets are designed to help manage impact forces during a crash. They do this through a hard outer shell, an energy-absorbing foam liner, and a shape that covers more of the head than many road-style helmets.
Impact absorption, coverage, and ventilation explained
The foam liner is the core protective layer. In a hard impact, it compresses to help reduce the force transferred to your head, while the shell helps spread the hit and improve durability.
Coverage matters because mountain biking exposes riders to more off-road falls, uneven terrain, and low-speed tip-overs than many other cycling styles. That is why trail helmets often extend farther down the back and sides of the head than lightweight road helmets.
Ventilation is the comfort side of the equation. More vents can help with airflow on hot climbs, but very open designs may trade away some coverage or durability depending on the model. The right balance depends on your climate and riding style.
Helmet standards generally focus on reducing injury risk in certain test impacts, but no helmet can eliminate the chance of injury in every crash.
What helmets can and cannot protect against
A helmet can help reduce the severity of some head impacts, but it is not a guarantee against concussion, facial injury, or neck injury. It also cannot make risky trail choices safe.
Protective gear reduces risk, but it cannot guarantee protection. If a helmet has been in a crash, shows damage, or no longer fits properly, follow the manufacturer’s guidance before riding again.
Helmets also cannot compensate for poor trail conditions, riding above your skill level, or ignoring local trail rules. Think of the helmet as one layer of safety, not the whole system.
Helmet Types for New Riders: Trail, All-Mountain, XC, and Full-Face
Mountain bike helmets are usually grouped by how much coverage and how much airflow they provide. The best category for a beginner depends on where you ride most often.
Which style fits your riding terrain and risk level
| Helmet type | Best for | Main trade-off |
|---|---|---|
| Trail | Most new riders on mixed terrain | Balanced coverage and ventilation |
| All-mountain | Steeper, rougher, or faster descents | Often a bit heavier or warmer |
| XC | Climbs, fitness rides, smoother trails | Less coverage than trail-focused options |
| Full-face | Bike parks, jumps, downhill, high-consequence riding | Hotter, heavier, and less casual for everyday use |
Trail helmets are the safest starting point for many first-time mountain bikers because they are versatile enough for local singletrack, fire roads, and moderate descents. XC helmets can work if your riding is mostly smooth and you want maximum airflow, but they usually offer less coverage.
When a full-face helmet makes sense for beginners
A full-face helmet can make sense for a beginner who is riding bike parks, lift-served terrain, jump lines, or steep downhill trails where facial protection becomes more important. It is not necessary for every new rider, and it may be uncomfortable for casual trail use.
Some riders choose a convertible or removable-chin-bar design, but those models should still be checked carefully for the intended use, certification, and manufacturer instructions.
Fit and Sizing: The Most Important Buying Decision
Fit matters more than brand, price, or vent count. A helmet that is certified but loose, tilted, or unstable can be far less useful than a simpler model that sits correctly on your head.
How to measure your head and read sizing charts
Use a soft measuring tape and wrap it around the widest part of your head, usually just above the eyebrows and around the back of the skull. Compare that measurement with the brand’s sizing chart, because sizes vary from one manufacturer to another.
If you fall between sizes, try to test the helmet with the exact hairstyle, cap, or hair accessories you plan to wear on rides. Small changes can affect fit more than many shoppers expect.
Do not assume that a “medium” from one brand feels like a medium from another. Head shape also matters: some helmets suit rounder heads, while others fit longer, narrower shapes better.
Adjustment systems, retention dials, and strap placement
Most modern mountain bike helmets use a rear retention dial and adjustable side straps. The dial should snug the helmet evenly without creating pressure points, and the straps should form a clean “V” around the ears.
The front edge should sit low enough to protect the forehead but not so low that it blocks vision. When you shake your head, the helmet should stay in place without wobbling or sliding forward.
- Adjust the helmet before your first ride, not at the trailhead.
- Check fit with sunglasses if you plan to ride with them.
- Recheck tension after a few minutes of wear, since padding can settle slightly.
Signs of a poor fit and common sizing mistakes
Common mistakes include buying too large, ignoring head shape, and setting the straps too loose under the chin. A poor fit often shows up as rocking, pressure on one spot, or a helmet that shifts when you look down.
- Choose the size based on head measurement and the brand chart.
- Make sure the helmet stays centered and level.
- Test the fit with your regular eyewear and hairstyle.
- Buying a helmet “for later” with the idea that it will fit eventually.
- Relying on thick padding to fix the wrong size.
- Using a helmet that moves when you shake or nod your head.
Safety Standards and Features to Verify Before You Buy
Look for current, relevant certification labels and confirm them against the manufacturer’s specifications. Standards are not just marketing details; they help show that a helmet was built and tested for a recognized level of use.
CPSC, ASTM, and MIPS: what each label means
CPSC is the U.S. bicycle helmet safety standard most shoppers will see. ASTM standards may appear on some mountain bike helmets, especially models intended for more aggressive riding or additional use categories.
MIPS is not a safety standard by itself. It is a rotational impact protection system used in many helmets, and it is one of several technologies designed to address angled impacts. Other brands may use different proprietary systems, so compare the actual helmet design rather than the logo alone.
Visors, coverage zones, and rotational impact protection
A visor can help with sun glare, light rain, and trail debris, but it should not be the reason you choose a helmet. Coverage zones matter more: look for enough rear and side coverage for off-road riding without sacrificing comfort or visibility.
Rotational impact protection systems may help manage certain angled impacts, but they do not replace proper fit or correct helmet use. Treat them as a useful feature, not a promise of complete protection.
Build quality, buckle design, and crash replacement policies
Inspect the shell finish, strap stitching, buckle quality, and overall construction. A helmet should feel solid, with no obvious loose parts, rough edges, or strange flex in the retention system.
- Confirm the helmet’s intended riding category.
- Verify the safety standard label on the product page or inside the helmet.
- Read the manufacturer’s crash replacement and warranty terms.
- Check the return policy in case the fit is wrong.
Crash replacement policies vary by brand, retailer, and region, so confirm the current terms before you rely on them. The official manual and warranty page should always be the final word for care and replacement guidance.
Comfort, Weather, and Trail Practicality
Comfort is not a luxury feature. If a helmet is hot, heavy, noisy, or awkward with your gear, you are less likely to wear it correctly and consistently.
Ventilation for hot weather and sweat management
Hot weather riders usually benefit from more airflow, moisture-wicking padding, and a helmet shape that moves air over the top of the head. In humid climates, comfort can matter as much as the number of vents.
Some helmets come with removable padding or antimicrobial treatments, but those features vary widely. Check whether the pads are washable and whether replacements are available before you buy.
Compatibility with sunglasses, goggles, and hydration packs
First-time riders often overlook gear compatibility. A helmet should work with your sunglasses or goggles without creating pressure points, and the rear shape should not interfere with hydration pack straps or ponytails.
Compatibility is highly model-specific. If you ride with goggles, verify that the helmet’s visor and eye opening are designed for that use rather than assuming all mountain bike helmets will work the same way.
Weight, padding, and noise considerations on longer rides
Lighter helmets can feel better on long climbs, but weight should not override fit or coverage. Extra padding may improve comfort, yet too much padding can trap heat and affect how the helmet sits.
Some helmets also catch more wind noise than others, especially at higher speeds or in open terrain. That is usually a comfort issue, not a safety issue, but it can affect how pleasant the helmet feels on longer rides.
Value, Trade-Offs, and Common Mistakes First-Time Riders Make
The best value is not the lowest price. It is the helmet that gives you the right fit, the right category, and the right safety verification for the riding you actually do.
How to balance price, protection, and durability
Start by deciding where you ride most often. A rider on mellow local trails may not need the same level of coverage as someone planning bike park days or rough descending.
Usually the best mix of fit, airflow, and coverage for new riders. The main limitation is that it may not be enough for aggressive downhill or park riding.
Better for steeper terrain, higher speeds, or more frequent crashes. The trade-off is more heat, more weight, or less everyday comfort.
Why the cheapest helmet is not always the best value
Very low-cost helmets may save money upfront, but they can be less comfortable, less durable, or harder to fit well. If the helmet is unpleasant to wear, you may end up leaving it behind on short rides.
That said, expensive does not automatically mean safer. A premium helmet is only a good purchase if the shape, size range, and riding category match your needs.
Overlooking fit, buying used, or choosing style over safety
One of the biggest beginner mistakes is buying a helmet based on looks or a sale price before checking fit. Another common mistake is buying used gear without knowing its crash history or storage history.
A used helmet may have hidden damage, degraded foam, or an unknown crash history. If you cannot verify its condition and age, new is the safer choice.
Care, Storage, Inspection, and When to Replace Your Helmet
Even a good helmet needs basic care. Dirt, sweat, UV exposure, and rough handling can all affect comfort and long-term condition.
Cleaning, drying, and storing a helmet properly
Use mild soap and water for the shell and pads unless the manufacturer recommends something different. Let the helmet air-dry fully before storage, and keep it out of direct heat such as a hot car trunk or radiator area.
Store it where it will not be crushed by other gear. A helmet that gets repeatedly bent, dropped, or packed under heavy items may lose its proper shape or develop damage you cannot easily see.
Post-crash inspection and damage warning signs
After any significant impact, inspect the shell, foam, straps, buckle, and retention system. Cracks, dents, soft spots, frayed straps, or a loose fit are all reasons to stop using the helmet until you follow the manufacturer’s replacement guidance.
Stop using damaged gear and follow the manufacturer’s inspection or service guidance. If the helmet took a crash, do not assume it is still safe just because the outside looks fine.
Replacement timelines and why protection degrades over time
Replacement timing varies by brand, storage conditions, use, and crash history. Many manufacturers recommend replacing a helmet after a crash and also replacing it after a period of normal aging, but the exact timeline should come from the product manual or brand support page.
Sun exposure, sweat, and everyday wear can age materials over time. That is why it is smart to check the helmet regularly instead of waiting for obvious damage.
Final Recommendation: The Best Helmet Choice for Most First-Time Mountain Bikers
For most beginners, the best choice is a well-fitting trail helmet from a reputable brand that clearly lists the correct cycling safety standard and fits your riding conditions. If you are riding steeper terrain, progressing quickly, or spending time in bike parks, move up to a more protective all-mountain or full-face option that still fits correctly and stays comfortable enough to wear.
Simple buying checklist for beginners in 2025
- Choose the helmet category based on your terrain, not on appearance.
- Confirm fit first, then check safety labels and comfort features.
- Verify compatibility with eyewear, hydration packs, and weather conditions.
- Follow the manufacturer’s cleaning, inspection, and replacement guidance.
Recommended next step based on riding style and budget
If your rides are mostly local trails and beginner-friendly terrain, start by trying trail helmets in your measured size range. If your budget is tight, prioritize fit and verified standards before paying extra for cosmetic features; if your riding is more aggressive, spend more on coverage and category-appropriate protection rather than vent count alone.
Common Questions
A trail helmet is usually the best first choice for most riders. It offers a practical balance of coverage, airflow, and comfort.
It should sit level, feel snug, and stay stable when you move your head. The straps should be adjusted so the helmet does not shift around.
It can be a useful feature, but it is not a substitute for fit or certification. Compare the whole helmet, not just the logo.
Sometimes, but mountain bike helmets usually offer more coverage and trail-friendly features. For off-road riding, a mountain bike-specific model is often the better match.
Yes, if the impact was significant or the manufacturer says to replace it. Hidden damage is possible even when the outside looks normal.
Frequently Asked Questions
A trail helmet is usually the best starting point for most beginners because it balances coverage, ventilation, and everyday comfort. If you ride steeper terrain or bike parks, an all-mountain or full-face helmet may be more appropriate.
It should sit level on your head, feel snug without pressure points, and stay stable when you shake your head. The straps should form a clean V around the ears, and the front edge should sit low enough to protect the forehead without blocking vision.
Look for the bicycle helmet standard used in your region, such as CPSC in the United States, and check whether the model also lists ASTM or another relevant standard for mountain biking. If a helmet includes MIPS or another rotational impact system, treat it as an added feature, not a replacement for certification.
Replace it after any significant crash and follow the manufacturer’s guidance for normal aging or service life. Exact timelines vary by brand, use, storage, and impact history, so check the manual for the model you buy.
No helmet can guarantee protection in every crash. A helmet can reduce risk in some impacts, but it cannot prevent all head, face, or neck injuries.
Buying used is risky because you usually cannot verify crash history, hidden damage, or how the helmet was stored. If you cannot confirm its condition and age, a new helmet is the safer choice.
