Choose a bike helmet by starting with fit, then confirming the right safety certification, and finally matching the model to your riding style. The best helmet is the one you will wear correctly, comfortably, and consistently.
Choosing the right bike helmet comes down to fit, safety certification, and the kind of riding you do most often. Style matters, but a helmet that sits correctly, stays secure, and matches your riding conditions is the one that gives you the best chance of real-world protection.
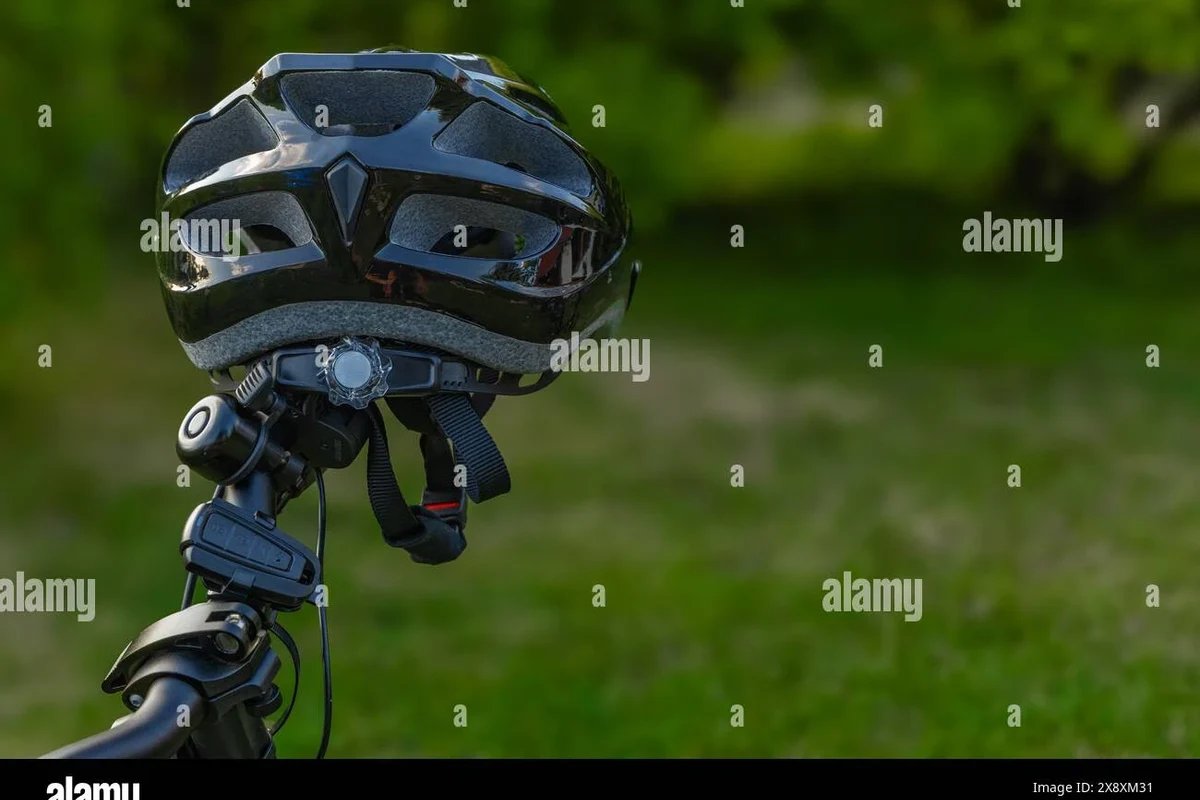
- Fit first: A level, stable helmet matters more than brand, color, or price.
- Check the label: Verify the correct certification for your region and riding use.
- Match the ride: Road, commuting, trail, and casual helmets emphasize different trade-offs.
- Use the adjusters: Retention dials and straps should secure the helmet without pressure points.
- Replace when needed: Any crash, visible damage, or failed fit system is a reason to stop using.
How to Choose the Right Bike Helmet: The Fast Answer for Safe Riding

Start with the right size, then verify the helmet meets current safety standards, and finally choose a shape and feature set that suits your riding style. If a helmet feels unstable, pinches, or sits too high, keep looking—even a well-known model is the wrong choice if the fit is off.
For most riders, the safest buying order is: measure your head, confirm certification, check fit system adjustability, then compare ventilation, coverage, and visibility features. That approach is more reliable than choosing by price, color, or brand alone.
Why Bike Helmet Fit Matters More Than Style or Price
Fit is the foundation of helmet safety. A helmet can have excellent materials and modern features, but if it shifts around, tilts back, or leaves gaps, it will not sit where it is supposed to during a fall.
How a helmet should sit on your head
A bike helmet should sit level on your head, not tipped back like a cap. The front edge should generally rest low enough to protect the forehead without blocking your vision, and the back should cover the upper rear of the head without riding up.
The helmet should feel centered and stable before you tighten the retention system. If it naturally wants to slide to one side or sits awkwardly on your head shape, that is a sign to try a different model rather than forcing the fit.
What “snug” really means for comfort and protection
“Snug” does not mean painful. It means the helmet stays in place when you move your head, but it does not create pressure points, hot spots, or numbness after a short wear.
- Shake your head gently side to side; the helmet should move with you, not slide independently.
- Check for pressure around the temples, forehead, and back of the skull after a few minutes.
- Remember that padding can improve comfort, but it should not be used to “force” a bad size to work.
Comfort also affects protection because riders are more likely to wear a helmet correctly when it feels tolerable for the whole ride. A helmet that feels good in the store but becomes distracting on the road is not a good fit.
Bike Helmet Safety Standards and Features to Verify in 2025
Safety features should be verified, not assumed. Look for recognized certification labels, then decide whether added impact-management technology or visibility features are useful for your riding conditions.
Certification labels to look for before you buy
Before buying, check the helmet label or product page for the applicable safety certification in your region. For many riders, that means looking for a recognized bicycle helmet standard such as CPSC in the United States, or the relevant regional standard where you live.
Certification requirements can vary by country, region, and intended use. Confirm the label on the actual helmet and review the manufacturer’s documentation before purchase.
If you are buying for a specific event, sport, or league, confirm the rules with the governing body or organizer. Some disciplines or local regulations may require additional standards, specific fit rules, or helmet replacement after an incident.
MIPS and other impact-management technologies explained
Some helmets include rotational-impact management systems, such as MIPS or similar brand-specific technologies. These systems are designed to allow limited relative movement inside the helmet during certain angled impacts, but they do not make a helmet crash-proof.
These features can be useful, but they are not a substitute for correct fit or a valid certification label. Treat them as an added design feature, not the main reason to buy a helmet.
Some helmets look similar on the outside but differ significantly in shell shape, retention systems, and certification coverage, which is why the label and fit matter more than appearance.
Visibility features for road, commuting, and low-light riding
For commuting and road riding, visibility can matter almost as much as ventilation. Bright colors, reflective details, and compatibility with lights or reflective accessories may help you stand out in traffic, especially in dawn, dusk, or rain.
Do not rely on visibility features alone. They help other road users notice you, but they do not replace defensive riding, proper lighting, and predictable lane positioning.
How to Measure Your Head and Choose the Correct Helmet Size
Helmet sizing usually starts with head circumference, but the final decision should also account for head shape and adjustability. A helmet in the correct size range can still fit poorly if the internal shape does not match your head.
Using head circumference to narrow the size range
Use a soft measuring tape and wrap it around the widest part of your head, usually just above the eyebrows and around the back of the skull. That measurement helps you narrow the size range listed by the manufacturer.
- Measure head circumference in the spot recommended by the brand.
- Compare the measurement to the helmet’s official size chart, not a generic chart.
- Check whether the model comes in round, intermediate, or oval-friendly shapes if the brand provides that information.
Size charts vary by model, so do not assume one brand’s medium matches another brand’s medium. If your measurement falls between sizes, use the manufacturer’s guidance and try both when possible.
Adjusting the retention system, straps, and buckle for a secure fit
Once the helmet is on, adjust the rear retention dial or cradle so the helmet feels secure without squeezing. Then set the side straps so they form a clean “V” shape under and slightly in front of the ears.
Place it level on your head before tightening anything.
Use the rear adjuster until the helmet feels stable but not compressed.
Adjust the side straps and chin strap so they stay flat and secure without pinching.
Leave enough room to open your mouth comfortably. The chin strap should be snug enough that the helmet stays on during a sudden movement, but not so tight that it becomes irritating or hard to breathe comfortably.
Choosing the Right Helmet for Your Riding Style and Conditions
The best helmet for a road cyclist is not always the best helmet for a commuter, trail rider, or casual weekend rider. Coverage, ventilation, visor design, and accessory compatibility should match the environment you spend the most time in.
Road cycling vs. commuting vs. mountain biking vs. casual riding
Road helmets usually prioritize ventilation and lighter feel. Commuter helmets often add visibility-friendly features and may favor a more balanced look and coverage, while mountain bike helmets may provide more rear coverage and visor compatibility.
| Riding type | Best for | Main trade-off |
|---|---|---|
| Road cycling | Longer rides, speed, airflow | Less coverage than some trail models |
| Commuting | Visibility, everyday use | May be warmer than minimalist road helmets |
| Mountain biking | Trail protection and visor use | Heavier or less ventilated than road options |
| Casual riding | Short rides and simple fit | Fewer performance features |
If you ride in more than one setting, look for the category that matches your highest-priority use. A commuter who occasionally takes a leisurely weekend ride may want a versatile helmet, while a trail rider should prioritize off-road coverage and compatibility first.
Weather, ventilation, coverage, and compatibility trade-offs
Hot climates usually favor better ventilation, while cold or wet conditions may make a slightly more enclosed helmet more comfortable with the right layering. More vents can improve airflow, but they may also reduce warmth and increase exposure to rain or wind.
Do not modify a helmet to improve airflow, fit, or accessory mounting. Follow the manufacturer’s instructions for compatible lights, visors, and winter accessories.
Eyewear compatibility is also worth checking. If you wear glasses or cycling sunglasses, make sure the helmet does not interfere with the arms of the frames or push the eyewear into an uncomfortable angle.
Key Specifications That Affect Comfort, Performance, and Value
Once fit and certification are covered, the remaining details determine how pleasant the helmet is to live with. These features rarely matter more than safety and sizing, but they can make a big difference in whether you actually enjoy wearing the helmet.
Weight, ventilation, padding, and adjustability
Weight can affect comfort on longer rides, though the difference is often more noticeable in use than on a spec sheet. Ventilation helps with heat management, while quality padding can improve feel without being the main fit solution.
Adjustability matters because heads are not identical even within the same size range. A good adjustment system can help refine a nearly perfect fit, but it cannot rescue a helmet that is fundamentally the wrong shape.
Visors, eyewear compatibility, and accessory considerations
Visors can help with sun and trail glare, especially for mountain biking or casual riding. However, they are not equally useful for every rider, and some road cyclists prefer a cleaner front profile for unobstructed visibility.
If you plan to use a helmet with lights, winter caps, or a ponytail, confirm those details before buying. Small compatibility issues can become daily annoyances if you rely on the helmet for commuting or training.
Budget vs. premium helmets: where value usually changes
Higher-priced helmets often add lighter materials, more refined fit systems, better ventilation, or more polished finishing. Lower-priced helmets can still be perfectly appropriate if they meet the right certification and fit correctly.
- Premium models may feel more comfortable on longer rides
- Budget models can still provide the core safety basics
- More expensive helmets sometimes offer better fit refinement
- Price alone does not guarantee better protection
- Some premium features are only meaningful for specific riders
- Budget options may have fewer comfort and adjustment extras
Value usually changes most in comfort, adjustability, and convenience—not in a dramatic jump in “safety” from one price tier to the next. That is why fit and certification should come first.
Common Bike Helmet Mistakes to Avoid
Many helmet problems come from buying decisions or strap setup errors rather than the helmet itself. Avoiding a few common mistakes can make a bigger difference than chasing the latest feature list.
Buying the wrong size or ignoring head shape
One of the most common mistakes is choosing a size based only on a brand label. Head circumference is useful, but head shape determines whether the helmet will feel stable or create pressure points.
If a helmet feels too round, too narrow, or too deep for your head, try a different model rather than hoping it will “break in” enough to work. Helmet fit should improve with adjustment, not rely on discomfort fading.
Wearing the helmet too high, too loose, or with poorly adjusted straps
A helmet worn too high leaves the forehead less protected and is more likely to shift in a fall. Loose straps or a slack retention system can allow movement that reduces effectiveness and makes the helmet feel unstable.
- Keep the helmet level and centered
- Recheck strap tension before regular rides
- Follow the manufacturer’s fitting instructions
- Wearing it tilted back to “look better”
- Leaving the chin strap loose for comfort
- Using thick accessories that change the fit without checking compatibility
Assuming one helmet can do every riding job equally well
Some helmets are versatile, but no single model is ideal for every rider and every environment. A helmet that is great for hot-weather road rides may feel under-ventilated for commuting or too minimal for rougher trail use.
Think in terms of your most common ride first, then your occasional second use. That usually leads to a better purchase than trying to make one helmet solve every scenario equally well.
Safe Use, Maintenance, and When to Replace Your Helmet
Buying the right helmet is only part of the job. Regular inspection, proper storage, and timely replacement matter because helmet materials can age and damage is not always obvious.
Cleaning, storage, and damage checks after every ride
After rides, check the shell, straps, buckle, and retention system for cracks, dents, fraying, or unusual looseness. Wipe away sweat and dirt according to the manufacturer’s care instructions, since harsh cleaners can damage some materials.
Stop using damaged gear and follow the manufacturer’s inspection or service guidance.
Store the helmet in a cool, dry place away from prolonged heat, direct sun, or chemicals. High heat and solvent exposure can weaken components over time, even if the helmet still looks fine on the outside.
Replacement guidance after crashes, wear, or age-related breakdown
Replace a helmet after any crash or impact that may have compromised its structure, even if the damage is not visible. Also replace it if the manufacturer recommends a service life limit, if the fit system no longer holds securely, or if the shell or foam shows signs of deterioration.
Because replacement guidance can vary by model and brand, check the official manual or manufacturer website for the exact recommendation. If you are unsure after an impact, it is safer to replace the helmet than to guess.
The limits of helmet protection and how to ride more safely overall
A helmet reduces risk, but it cannot prevent every injury. Safe riding still depends on visibility, route choice, traffic awareness, speed control, and obeying local rules.
For the best overall protection, pair the right helmet with proper lights, reflective details when needed, and regular inspection of the bike itself. If you have a medical condition, a recent head injury, or ongoing pain, seek qualified professional guidance before returning to riding.
- Choose the helmet that fits your head shape and size range first.
- Verify the correct safety certification and relevant riding-specific features.
- Match ventilation, coverage, and visibility to your usual riding conditions.
- Inspect, clean, and replace the helmet according to the manufacturer’s guidance.
Frequently Asked Questions
It should sit level, feel snug, and stay stable when you move your head. It should not pinch, tilt back, or slide around.
Look for the recognized bicycle helmet standard used in your region, such as the applicable label in your country. Always confirm the actual helmet label and check the manufacturer’s documentation before buying.
They are impact-management features designed for certain angled impacts, but they do not make a helmet crash-proof. Fit and certification still matter more than any single extra feature.
Measure your head circumference and compare it with the brand’s official size chart. If you are between sizes, use the manufacturer’s guidance and try the helmet on if possible.
Replace it after a crash, if the shell or foam is damaged, or if the retention system no longer works properly. Also follow the manufacturer’s age and replacement guidance in the manual.
Sometimes, but not always well. The best choice depends on your main riding style, weather, ventilation needs, coverage, and compatibility with visors or lights.
