Beginners should prioritize fit, compatibility, and safety before buying extra MTB accessories. The best starter setup is a helmet, gloves, eye protection, hydration, and basic repair gear chosen for the rider’s terrain and trail length.
Beginners make the same MTB accessory mistakes for one simple reason: they buy for the shelf, not for the trail. The smartest approach is to start with fit, compatibility, and safety, then add only the accessories that match your riding style and local conditions.
- Fit first: Helmets, gloves, shoes, and pads only help if they stay secure and comfortable.
- Check compatibility: Verify mounts, clearance, cockpit space, and frame fit before buying.
- Buy essentials before extras: Safety gear, hydration, and repair basics should come first.
- Match conditions: Weather, terrain, and ride duration should shape your accessory list.
- Inspect often: Stop using damaged protective gear and follow the manufacturer’s guidance.
Common MTB Accessory Mistakes Beginners Make: The Fast Answer
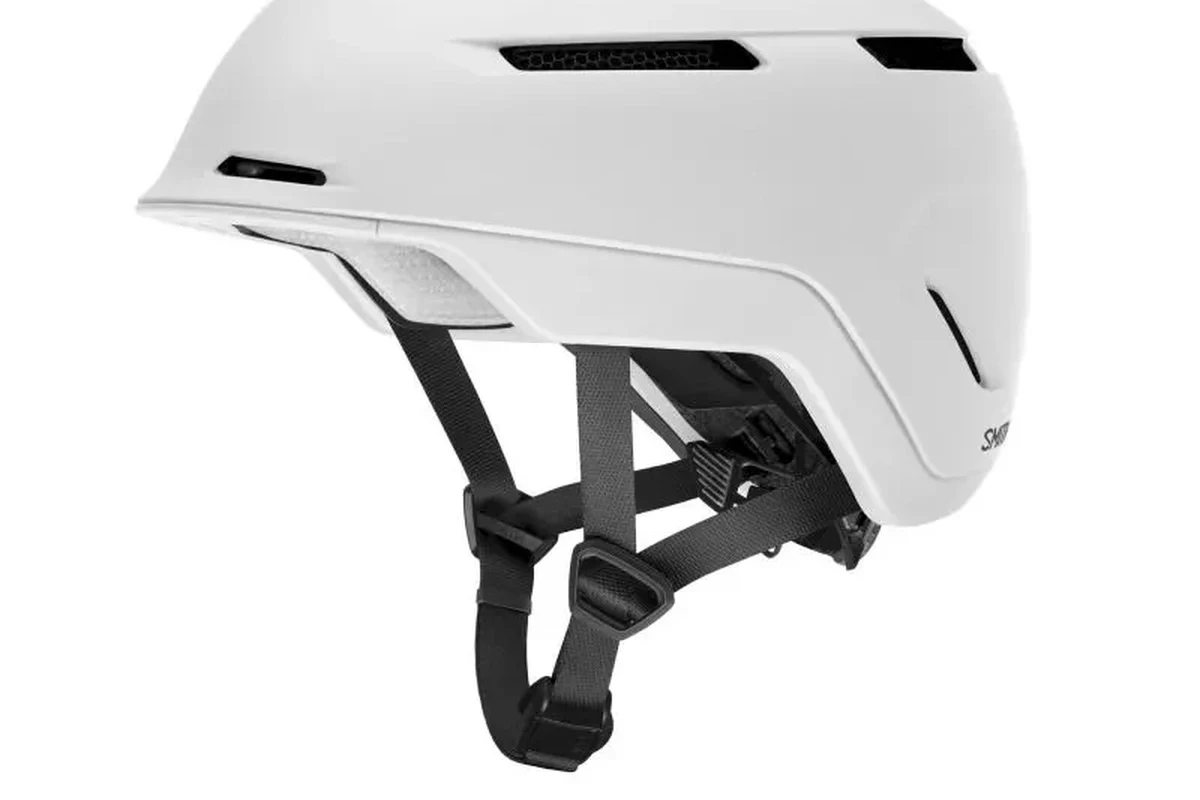
If you are new to mountain biking, the biggest mistake is assuming more gear automatically means better riding. In reality, the right few accessories usually matter far more than a long list of extras.
Why the right accessories matter more than buying the most expensive ones
MTB accessories should solve a real problem: keeping you protected, helping you stay in control, and making it easier to handle basic trail needs. A premium item that fits poorly or does not match your bike can be less useful than a modest option that is compatible, comfortable, and easy to use.
The biggest beginner errors in one glance: fit, compatibility, safety, and overbuying
Most beginner mistakes fall into four buckets: buying accessories that do not fit the rider, buying parts that do not fit the bike, skipping safety essentials, or loading the bike with unnecessary extras that add weight and clutter. If you avoid those four traps, you will usually spend less and ride more comfortably.
How MTB Accessories Work in Real Riding Conditions
MTB accessories are only useful when they match the way you actually ride. Trail surface, weather, ride length, and your skill level all change what matters most.
What accessories actually improve on trail: control, comfort, protection, hydration, and repair readiness
Useful MTB accessories tend to do one of five jobs. They improve control through better grip or visibility, increase comfort through better fit or storage, add protection through helmets and pads, support hydration on longer rides, or keep you moving with repair tools and spares.
For beginners, the best accessory is usually the one that removes friction from the ride: safer fit, easier carrying, simpler repairs, or more predictable hydration.
Terrain and weather factors beginners often overlook in 2025
Wet roots, loose gravel, mud, dust, heat, cold, and changing daylight all affect what you need to carry and wear. A glove that feels fine on a short dry loop may feel wrong on a cold, wet descent, and a hydration setup that seems optional on a 30-minute spin may become essential on a longer trail day.
Where accessories help—and where they cannot compensate for poor technique
Accessories can improve comfort and reduce avoidable problems, but they cannot replace line choice, braking control, or balance. A better helmet does not make a bad fit safe, and a more expensive multitool does not fix a lack of basic riding skills.
The Most Common MTB Accessory Mistakes Beginners Make
Buying gear before checking bike compatibility
One of the most common errors is buying mounts, bags, lights, pedals, bottle cages, or storage solutions before checking whether the bike has the clearance or attachment points they need. Frame shape, suspension travel, cockpit space, and tire clearance can all affect what works.
- Check frame, fork, handlebar, and seatpost compatibility
- Confirm clearance for suspension, tires, cables, and moving parts
- Read the manufacturer specs and installation notes
Choosing style over fit for helmets, gloves, shoes, and pads
Fit is not just comfort; it is part of how protective gear works. A helmet that shifts, gloves that bunch, shoes that are too loose, or pads that slide around can distract you and reduce the usefulness of the gear.
Protective gear reduces risk, but it cannot guarantee protection. If a helmet, pad, or shoe fit feels unstable, follow the official sizing guidance or choose a different model.
Overloading the bike with unnecessary add-ons
Beginners often add too many accessories at once: extra bags, oversized mounts, multiple lights, decorative gadgets, and heavy storage solutions. That can add noise, weight, and clutter, which makes the bike less pleasant to handle and harder to keep organized.
- Carry only what you need for the ride length and location
- Keep the cockpit clean so controls stay easy to reach
- Adding accessories just because they look trail-ready
- Stacking multiple storage solutions without a clear purpose
Ignoring trail conditions, climate, and ride duration
Accessory needs change with weather and distance. A short ride near home may only require basic protection and a bottle, while a longer backcountry ride may call for more water, a repair kit, and weather-appropriate layers or storage.
Skipping safety essentials in favor of cosmetic upgrades
It is easy to spend on matching colors, flashy pedals, or aesthetic upgrades before covering the basics. For beginners, that usually means the wrong order of priorities: safety first, convenience second, style last.
- Buy safety gear before cosmetic accessories.
- Match hydration and repair gear to ride length, not just budget.
- Keep a small “must-carry” kit for every ride so you do not forget essentials.
How to Choose MTB Accessories That Actually Fit Your Riding Style
Cross-country, trail, enduro, and casual riding: different needs, different priorities
Cross-country riders often care more about low weight, efficient storage, and simple hydration. Trail riders usually need a balance of comfort, protection, and practical carry options, while enduro riders may prioritize more robust protection and secure fit. Casual riders may value ease of use and comfort above all else.
Key decision criteria: durability, weight, adjustability, weather resistance, and ease of use
When comparing accessories, focus on how they hold up, how easy they are to adjust, and how they behave in rain, mud, heat, or cold. The best choice is usually not the lightest or the most expensive; it is the one that stays secure, works quickly, and does not become annoying after repeated use.
Compatibility checks for mounts, tire clearance, storage, and cockpit space
Before buying, confirm where the accessory will sit on the bike and whether it interferes with steering, braking, suspension movement, bottles, or frame bags. If the manufacturer gives installation limits or fit charts, use those instead of guessing.
Compatibility can vary by frame size, suspension design, handlebar shape, and accessory brand. Always confirm the exact model and size before ordering.
Safety Gear: Fit, Standards, and Limits of Protection
Helmet fit basics: size, retention system, coverage, and comfort points
A proper MTB helmet should sit level, feel snug without pressure points, and stay stable when you move your head. The retention system should secure the helmet without making it painful, and the coverage should match the type of riding you plan to do.
Standards to verify in 2025 for helmets and protective gear
Look for current certification or compliance information from the manufacturer and the relevant safety organization for your region. Standards can vary by country and by gear type, so verify the exact label, model, and intended use before you buy.
If a helmet, pad, or strap shows cracks, torn padding, broken buckles, or a damaged retention system, stop using it and follow the manufacturer’s replacement guidance.
How to inspect pads, gloves, and helmets for damage or wear
Check for visible cracks, compressed foam, frayed straps, loose stitching, worn palm material, and hardware that no longer adjusts smoothly. Even if the gear still “looks okay,” repeated impacts, sweat, sun exposure, and age can reduce performance over time.
When to replace protective gear and why protection has limits
Replace items when the manufacturer says to, after a significant impact, or when wear affects fit and function. No protective gear can eliminate injury risk, so the goal is risk reduction, not total protection.
Essential MTB Accessories Beginners Should Prioritize First
Helmet, gloves, and eye protection: the core starter set
For most new riders, the first purchases should be a properly fitting helmet, gloves that improve grip and comfort, and eye protection suited to dust, wind, and debris. These items support the basics: head protection, hand control, and clearer vision.
Hydration solutions, repair kits, and mini pumps: what to carry and why
Hydration is easy to underestimate, especially on longer or hotter rides. A bottle, hydration pack, or other carry system should match your bike, your route, and how much water you realistically need, while a repair kit and compact pump help you handle common trail interruptions.
Best for nearly every beginner because they address comfort and safety early. The main limitation is that fit varies by brand, so try to verify sizing carefully.
Best for riders who want simple self-sufficiency on local trails. The limitation is that it should match your tire setup and the repairs you are prepared to handle.
Lights, multitools, and storage options: practical value versus extra weight
Lights matter if you start early, finish late, or ride in low visibility. A multitool and small storage solution can be very useful, but each one should earn its place by solving a real problem instead of just adding bulk.
Value comparison: budget picks versus premium upgrades
Budget accessories can be a smart starting point if they fit well and come from a reputable brand with clear specifications. Premium upgrades usually make sense when you already know your riding style, need better materials or adjustability, or want a more refined fit; otherwise, the extra cost may not bring meaningful benefits.
| Option | Best For | Key Consideration |
|---|---|---|
| Budget starter gear | New riders building a basic kit | Check fit, comfort, and manufacturer guidance first |
| Mid-range gear | Riders who know their style | Often the best balance of value and features |
| Premium upgrades | Frequent riders with specific needs | Only worth it if the added features solve a real problem |
Setup, Care, and Storage Tips for MTB Accessories
How to set up accessories correctly before the first ride
Read the product instructions, confirm torque or mounting guidance where relevant, and test that nothing interferes with steering, braking, suspension, or pedal stroke. If a part seems forced into place, do not assume it is “good enough.”
Confirm the accessory sits securely without blocking controls, movement, or airflow.
Use a short, easy ride to confirm comfort, stability, and reach before a longer outing.
Cleaning, drying, and storing gear to extend lifespan
Trail dirt, sweat, and moisture wear down accessories faster than many beginners expect. Clean gear gently, dry it fully before storage, and keep it out of extreme heat or direct sun when not in use.
Common maintenance mistakes that shorten accessory life
The most common mistakes are storing damp gear, ignoring loose straps or frayed stitching, using harsh cleaners on sensitive materials, and waiting until something fails before inspecting it. Small care habits usually make a bigger difference than buying a more expensive replacement later.
Safe progression: adding accessories gradually as skills improve
It is usually smarter to build your kit in stages. Start with safety and essentials, then add trail-specific items after you understand what you actually miss on your rides.
Keep a simple checklist for every ride: helmet, gloves, eye protection, water, repair basics, and any weather-specific layers or lights.
Final Recommendation: A Smarter Beginner MTB Accessory Checklist
The best order to buy accessories for safety, comfort, and trail readiness
Begin with a properly fitting helmet, gloves, and eye protection. After that, add hydration, a basic repair kit, and a pump or inflation solution, then choose storage, lights, or pads based on the kind of riding you actually do.
What to avoid, what to verify, and when to upgrade
Avoid buying for looks alone, buying before checking compatibility, and overloading the bike with accessories you do not need. Verify sizing, certification or compliance details, installation guidance, and care instructions before purchase, and upgrade only when your current gear is limiting comfort, safety, or usability.
Transparent takeaway for new riders in 2025
The smartest beginner setup is not the biggest one. It is the one that fits well, matches your terrain, and covers the essentials without adding avoidable weight, clutter, or risk.
- Start with fit, compatibility, and safety before style or extras.
- Match accessories to terrain, weather, and ride length.
- Inspect gear regularly and replace damaged protective items promptly.
- Add new accessories gradually as your riding needs become clearer.
Frequently Asked Questions
Start with a properly fitting helmet, gloves, and eye protection. Then add hydration, a basic repair kit, and a pump before buying comfort or storage extras.
Check the manufacturer’s compatibility notes for frame size, suspension design, tire clearance, cockpit space, and mounting points. If the instructions mention limits, follow them instead of guessing.
It should sit level, feel snug without pressure points, and stay stable when you move your head. Use the retention system to fine-tune the fit, and follow the brand’s sizing guide.
Replace gear after a significant impact, when the manufacturer says to, or when wear affects fit and function. Cracks, torn straps, broken buckles, or compressed foam are signs to stop using it.
Not always. Premium gear can be useful, but only if it solves a real need and fits correctly; otherwise, a simpler option may be better value.
Verify sizing, compatibility, care instructions, and any current certification or compliance information from the manufacturer. Also check return policy and warranty details before you buy.
