Use a compatible CO2 inflator, attach it securely to the valve, and release gas in a controlled way. CO2 is best for fast trail repairs, while a floor pump is still the better choice for regular pressure setup.
If you need a fast trail-side fix, CO2 can inflate a mountain bike tire in seconds. The process is simple: check the tire and valve, attach the inflator correctly, release the cartridge in a controlled way, and then confirm the pressure before you ride.
- Compatibility first: Match the cartridge, inflator, and valve type before you start.
- Inflate carefully: Release CO2 in a controlled way to avoid leaks and overinflation.
- Best for emergencies: CO2 is ideal for trail repairs, racing, and quick fixes.
- Know the limits: Cartridges are single-use and not as precise as a floor pump.
- Check after inflation: Inspect the tire, bead, and valve before riding away.
How to Inflate a Mountain Bike Tire with CO2: The Fast Answer
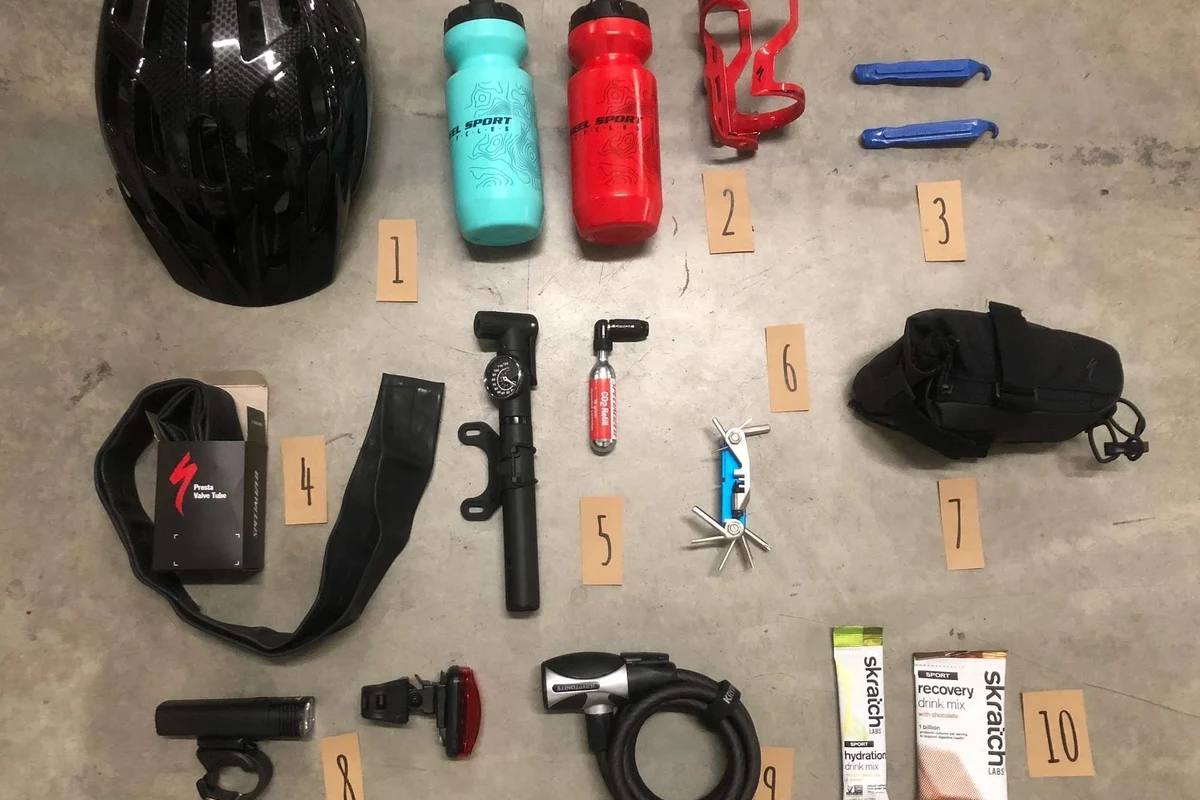
Use a compatible CO2 inflator, make sure your valve type matches, and release gas gradually into the tire. CO2 is best viewed as a quick inflation tool, not a substitute for a proper pump at home.
This guide focuses on safe, practical CO2 inflation for mountain bikes, including what to carry, what to check first, and where CO2 fits into a rider’s repair kit.
How CO2 Tire Inflation Works for Mountain Bikes
CO2 cartridges store compressed gas in a small, single-use cylinder. When you puncture the seal inside the inflator head, the gas rushes into the tire and raises pressure quickly.
That speed is the main reason riders carry CO2 on the trail. It is especially useful after a flat, when you want to get the tire seated and rideable without spending time pumping by hand.
Mountain bike tires often run at lower pressures than many road tires, and tubeless setups may need enough air to seat the bead. CO2 can help with both, but the exact result depends on tire volume, rim design, valve condition, and cartridge size.
CO2 can cool sharply as it expands, which is why the cartridge and inflator may feel very cold during use.
What You Need Before You Start
Before inflating, confirm that your tire, valve, and inflator are compatible. A few seconds of checking can prevent a bad seal, wasted cartridge, or damaged valve core.
CO2 cartridge sizes, inflator heads, and valve compatibility
Cartridge capacity varies by model, and the right choice depends on tire size, desired pressure, and whether you are inflating one tire or trying to seat a tubeless bead. Inflator heads also vary: some are simple push-on designs, while others thread onto the valve for a more secure connection.
Check the inflator’s instructions for the cartridge type it accepts. Some systems are designed for threaded cartridges, and some are not interchangeable with non-threaded versions.
- Confirm cartridge style and inflator compatibility
- Check whether the inflator works with Presta, Schrader, or both
- Verify whether your tire setup needs enough gas for one tire or bead seating
- Review the manufacturer’s instructions for safe cartridge handling
Presta vs. Schrader valves on mountain bike tires
Most mountain bikes use Presta valves, but some use Schrader valves, especially on certain entry-level or older setups. Presta valves are narrower and usually have a small locknut at the top that must be loosened before inflation.
Schrader valves are wider and work more like a car tire valve. If your inflator does not match the valve directly, use only an adapter that is designed for that purpose.
Valve compatibility can vary by wheel, tube, or tubeless valve system. If you are unsure, check the valve itself and the inflator instructions before attaching the cartridge.
Step-by-Step: How to Inflate a Mountain Bike Tire with CO2
Work slowly at first, even though the inflation itself is fast. The main goal is to avoid leaks, overinflation, and damage to the valve or tire bead.
Inspect the tire for cuts, embedded debris, or obvious sidewall damage. If the tire is badly torn or the bead is off the rim, CO2 may not be enough to make the bike safe to ride.
Thread or press the inflator onto the valve according to the manufacturer’s design, then release gas in a controlled way. Keep hands clear of the discharge path because the cartridge and inflator can become very cold.
Stop once the tire reaches a rideable pressure for your terrain and setup, then remove the inflator carefully. If the tire is tubeless, listen for leaks and confirm the bead is seated before rolling away.
Prepare the tire and check for punctures
First, remove whatever caused the flat if it is still in the tire. If you are using a tube, check the tube for pinch damage or a second puncture; if you are running tubeless, look for sealant loss, a damaged valve, or a cut that may need a plug or tire boot.
For tubeless riders, CO2 can be a useful emergency tool, but the tire should still be inspected after inflation. A tire that will not hold air may need a different repair before you continue riding.
Stop using any tire, tube, valve, or inflator that is cracked, bent, stripped, or otherwise damaged. Follow the manufacturer’s inspection and replacement guidance before continuing.
Attach the inflator and release the cartridge safely
Make sure the valve is open and the inflator is seated firmly. If your inflator has a flow-control feature, use it to release gas gradually rather than dumping the full cartridge at once.
Keep the cartridge pointed away from your face and body. A sudden discharge can be startling, and the cold metal can irritate skin if handled carelessly.
Do not force a mismatched inflator onto a valve, and do not use a cartridge system that the manufacturer does not approve for your inflator head.
Set the tire pressure and remove the inflator
With mountain bike tires, the target pressure depends on terrain, rider weight, tire width, casing, rim width, and whether you run tubes or tubeless. Use the pressure range recommended by the tire and rim manufacturers as your starting point, then adjust for your own setup later with a floor pump and gauge.
After inflation, remove the inflator carefully to avoid losing too much gas. If the tire seems underinflated, a second cartridge may help, but only if you carried a spare and the tire still appears structurally sound.
Choosing the Right CO2 Setup for MTB Riding
The best CO2 setup is the one that matches your riding style and repair habits. A racer may prioritize speed, while a trail rider may care more about portability and enough gas for a larger tire volume.
Key decision criteria: cartridge capacity, weight, and portability
Cartridge size matters because mountain bike tires have more air volume than many other bike tires. A smaller cartridge may be enough for a quick repair, but not always enough to fully seat a tubeless bead or refill a large-volume tire to your preferred pressure.
Weight and size matter too. Riders who value minimal pack weight may choose a compact inflator and one cartridge, while riders on longer rides may carry a spare cartridge for backup.
Best use cases: trail riding, racing, and emergency repairs
CO2 is a strong fit for emergency repair kits, race-day use, and situations where speed matters more than long-term convenience. It is also useful when you want to get moving quickly after fixing a flat on the trail.
For home use, repeated inflation with a floor pump is usually more practical. A pump gives you more control, no cartridge waste, and a way to fine-tune pressure before the ride.
Good for riders who want a small, fast emergency option. The main limitation is that it depends on cartridge compatibility and gives you only one or two inflation attempts.
Better for riders who want repeatable pressure control and no single-use cartridges. It is slower, but more versatile for home maintenance.
Benefits and Trade-Offs of CO2 Inflation on the Trail
CO2 is popular because it solves one problem very well: speed. But that speed comes with trade-offs that matter if you ride often or rely on tubeless tires.
- Very fast inflation after a flat
- Compact and easy to carry
- Useful for trail repairs and race support
- Single-use cartridges create ongoing cost
- Pressure can drop as the cartridge empties or cools
- Not ideal as your only inflation method
Speed, convenience, and compact storage
CO2 inflators take very little space, which makes them easy to stash in a jersey pocket, hip pack, or saddle bag. They are also fast enough to get many riders back on the trail in moments rather than minutes.
That convenience is especially valuable when weather is poor, daylight is fading, or you are standing off-trail with a flat tire and limited tools.
Limitations: pressure loss, cold cartridge discharge, and single-use cost
CO2 does not always hold pressure as predictably as air from a pump. Some riders notice pressure changes after the gas cools, and that can matter on lower-volume or tubeless setups.
Because cartridges are single-use, they also create recurring cost and waste. Over time, a floor pump remains the better value for routine inflation, even if CO2 stays useful as backup.
- Carry one cartridge for a short ride and a spare for longer backcountry rides.
- Keep the inflator and cartridge dry and protected from dirt inside a repair kit.
- Use a floor pump at home to set your preferred pressure before relying on CO2 in the field.
- For tubeless tires, confirm bead seating as soon as the tire is inflated.
Common Mistakes, Safety Tips, and Tire Care After Inflation
Most CO2 problems come from rushing the setup. A few careful habits can reduce leaks, valve damage, and wasted cartridges.
Avoiding overinflation, sealant issues, and valve damage
Do not assume that one cartridge equals one correct pressure for every mountain bike tire. Tire volume, rim width, and weather all affect the result, so it is better to release gas in a controlled way than to empty the cartridge all at once without checking.
If you ride tubeless, remember that some sealants react differently to CO2 than to regular air. Manufacturer guidance for your sealant and tire system is the safest source to check before relying on CO2 as a routine solution.
- Check valve type before attaching the inflator
- Use the inflator according to the manufacturer’s instructions
- Inspect the tire again after inflation
- Forcing the inflator onto the valve
- Touching the cartridge immediately after discharge
- Relying on CO2 to fix a seriously damaged tire
Storage, spare cartridge care, and when to switch to a floor pump
Store cartridges in a cool, dry place and keep them away from sharp objects and heat sources. Check their condition periodically so you are not surprised by rust, dents, or damaged threads when you need them.
Switch to a floor pump when you are setting up new tires, checking pressure before a ride, or troubleshooting a slow leak. CO2 is best treated as a field tool, while a pump is the better everyday tool.
After a trail repair, use a proper pump and gauge at home to re-check pressure before your next ride. That gives you a more accurate baseline than CO2 alone.
Final Recommendation: When CO2 Makes Sense for Mountain Bikers
CO2 makes the most sense for riders who want a compact emergency inflation method and value speed over long-term convenience. It is a smart addition to a trail repair kit, especially if you ride tubeless, race, or spend time far from a shop.
For regular maintenance, though, a floor pump should still be your primary tool. The most practical setup for many mountain bikers is a floor pump at home plus a CO2 inflator and cartridge on the bike for emergencies.
Choose CO2 if you want fast, portable inflation for flats and trail repairs, but keep a pump for accurate everyday pressure control. If your riding is mostly at home or around town, a pump-first setup is usually the better choice.
Frequently Asked Questions
You need a compatible CO2 cartridge, an inflator head that matches your valve, and a tire that is still structurally sound. A cloth or gloves can help because the cartridge gets very cold during discharge.
CO2 is faster and more portable, so it is useful for trail repairs and emergencies. A floor pump is better for routine inflation because it gives more control and can be reused indefinitely.
Yes, many riders use CO2 with tubeless tires, especially to help seat a bead or get rolling after a flat. Check your tire, rim, sealant, and inflator instructions because results can vary by setup.
Check the inflator’s product instructions and the valve on your wheel. Presta valves are narrow and usually have a small locknut at the top, while Schrader valves are wider and resemble car tire valves.
CO2 cools quickly as it expands from the cartridge into the tire. That sudden temperature drop is normal, which is why it helps to keep your hands clear and handle the cartridge carefully.
Use a floor pump for home maintenance, pressure checks, and dialing in your setup before a ride. CO2 is best reserved for quick roadside or trail repairs when speed matters more than repeatable pressure control.
