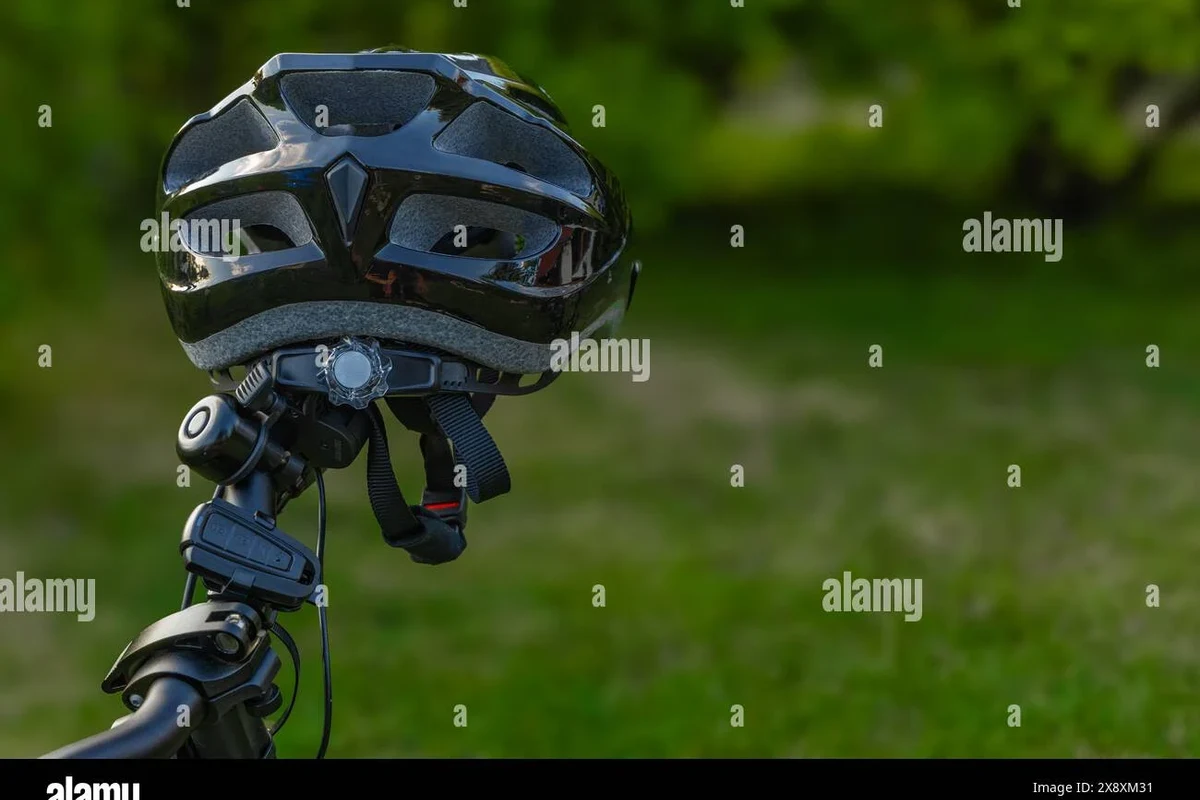
Use a helmet-compatible light or mount, follow the helmet and light manuals, and avoid any modification that could weaken the helmet. The best setup is usually lightweight, secure, and paired with bike-mounted lights for full visibility.
If you want to add lights to an e-bike helmet, the safest approach is usually a lightweight, helmet-compatible light or mount that does not interfere with the shell, vents, or fit system. The basic process is simple: choose a compatible setup, clean the contact area, secure the mount according to the manual, and test visibility, balance, and access before riding.
- Compatibility first: Choose a light and mount designed for your helmet shape and ventilation layout.
- Do not modify the helmet: Avoid drilling, cutting, or altering the shell or foam.
- Visibility works best in layers: Pair helmet lights with bike lights and reflective gear.
- Comfort matters: A secure setup should not block vents, create pressure points, or feel top-heavy.
How to Install Lights on an E-Bike Helmet: The Quick Answer and What You’ll Need
The easiest way to install lights on an e-bike helmet is to use a purpose-made helmet light kit or a light with an approved helmet mount, then attach it only where the manufacturer says it is safe. Avoid drilling, cutting, or permanently altering the helmet shell or foam, since that can compromise protection.
Before you start, confirm the helmet model, the light’s mounting method, and whether the setup is meant for front visibility, rear visibility, or both. If the light is heavy, bulky, or poorly balanced, it may be better on the bike itself rather than the helmet.
Why Helmet-Mounted Lights Matter for E-Bike Riders in 2026
Helmet lights are not mandatory for every rider, but they can make you easier to notice in traffic because the beam moves with your head. That head movement can help drivers, pedestrians, and other riders pick up on your presence sooner than a fixed light alone.
Visibility in traffic, dusk, rain, and low-light commutes
E-bike riders often travel faster than traditional cyclists, which can make visibility more important in mixed traffic. A helmet light can help in dusk, rain, fog, or shaded streets where visibility changes quickly and your line of sight matters.
A helmet-mounted light can point where you look, which may help signal lane changes, turns, and hazards more naturally than a fixed handlebar light.
How helmet lights complement bike-mounted lights, not replace them
Helmet lights work best as a complement to handlebar and rear bike lights. Bike-mounted lights help other road users see the bike’s position, while helmet lights add directional visibility and can improve what you see on unlit paths or in corners.
Do not rely on a helmet light as your only light source. For road use, confirm your local lighting rules and use a setup that keeps you visible from the front and rear.
Choosing the Right Light Setup for Your E-Bike Helmet
The best setup depends on how you ride, how much weight your helmet can comfortably carry, and whether you need front, rear, or side visibility. A commuter who rides in traffic may want a different setup than a casual weekend rider or a delivery rider who spends long hours on the road.
Light type: front, rear, side visibility, and combined kits
Front-facing lights help you see and be seen, while rear lights are mainly for being noticed from behind. Some kits add side visibility or reflective accents, which can be useful at intersections and on urban streets where cross-traffic is common.
Compact front helmet light
Good for commuters who want directional visibility and a small, low-profile setup. The trade-off is that it may not provide enough rear visibility on its own.
Front-and-rear combined kit
Better for riders who want a more complete visibility solution from a single purchase. Check weight, battery access, and whether both lights can be mounted without affecting comfort.
Mounting method: adhesive, strap, clip, magnetic, or accessory bracket
Strap and clip systems are usually easier to remove and less likely to damage the helmet than permanent adhesive. Magnetic and bracket systems can be convenient, but they need a secure base and should not create a loose or unstable attachment.
Adhesive mounts vary widely by model and surface type. Always confirm whether the adhesive is approved for your helmet shell before applying it, and follow the removal guidance if you later need to replace the helmet.
Key specs to verify: brightness, beam pattern, battery life, weight, and weather resistance
Do not choose by brightness alone. A light that is too intense, poorly aimed, or aimed at drivers’ eyes can be distracting, while a balanced beam pattern and dependable runtime are usually more useful for commuting.
Helmet compatibility, ventilation coverage, and comfort trade-offs
A light that blocks vents or sits too far forward can make a helmet feel hot, top-heavy, or awkward. Check whether the mount works with your helmet’s shape, especially if the helmet has deep vents, a rounded shell, or a rear adjustment dial that needs clearance.
Step-by-Step: How to Install Lights on an E-Bike Helmet Safely
Use the light maker’s instructions first, because attachment points and weight limits can vary. If anything about the setup feels forced, unstable, or incompatible, stop and choose a different mount rather than improvising.
Preparing the helmet surface and checking placement
Start with a clean, dry helmet shell. Remove dirt, sweat residue, sunscreen, or dust so the mount can sit properly, then test the placement before removing any adhesive backing or tightening straps.
- Place the light where it does not interfere with the chin strap, visor, or rear adjustment dial.
- Check that the light is centered or intentionally angled for visibility before final tightening.
- Test the helmet on your head before committing to adhesive or a permanent bracket.
Securing the mount without damaging the shell or EPS foam
Helmet shells and impact foam are not the place for drilling, cutting, or using hardware that pierces the helmet. Use only attachment methods designed for helmets, and avoid any setup that requires structural modification.
- Use helmet-approved straps, clips, or brackets
- Follow torque, tension, and placement guidance in the manual
- Replace the helmet if the shell or foam is damaged
- Drilling into the shell
- Cutting vents or foam for cable routing
- Using random hardware not intended for helmets
Routing cables or straps for a stable, snag-free fit
If your light has a cable, route it so it does not dangle, pinch, or catch on jacket collars, backpack straps, or branches. Strap ends should be tucked securely, and any slack should be minimized without overtightening the helmet fit.
Testing alignment, switch access, and vibration resistance
After mounting, turn the light on, check the beam direction, and make sure the switch or charging port remains easy to reach. Gently shake the helmet and simulate head turns to see whether the light stays put under normal movement.
If the mount slips, the shell is damaged, or the adhesive leaves residue that weakens the helmet surface, stop using that setup and follow the manufacturer’s replacement guidance.
Fit, Safety Standards, and Protection Limits You Should Verify
Adding lights does not change the fact that the helmet must fit correctly and meet the standards relevant to your region and riding type. The light should enhance visibility without reducing the helmet’s ability to stay secure on your head.
Helmet fit basics: size, retention system, and chin strap adjustment
A helmet should sit level, not rock forward or backward, and the retention system should hold it firmly without pressure points. The chin strap should be snug enough that the helmet does not shift, but not so tight that it becomes uncomfortable or hard to wear correctly.
Standards to look for: CPSC, EN 1078, and relevant e-bike or commuter certifications
Check the helmet label or product documentation for the standards that apply in your market. Depending on region and intended use, that may include CPSC, EN 1078, or other commuter- or e-bike-specific certifications, but you should verify the exact claim on the current product page or manual.
What helmet lights can and cannot protect you from
Helmet lights improve visibility, but they do not guarantee that drivers will see you or that an impact will be harmless. They also do not replace safe riding habits, route selection, reflective gear, or properly functioning bike lights.
When to replace the helmet after impact, wear, or adhesive damage
Replace the helmet after a crash or any impact that the manufacturer says could compromise its structure. Also replace it if the shell or foam is damaged by installation, if adhesive weakens the surface, or if normal wear makes the fit less secure.
Common Installation Mistakes and How to Avoid Them
Most problems come from trying to make a non-compatible light work on a helmet that was never designed for it. A cleaner, lighter, and more secure setup is usually safer than a stronger-looking but awkward attachment.
Blocking vents, reducing comfort, or creating pressure points
Mounts that cover vents can reduce airflow and make long rides less comfortable. A hard contact point on the forehead or crown can become distracting fast, especially on rough roads or longer commutes.
Using mounts that are too heavy, loose, or incompatible
Heavy lights can shift the helmet’s balance, while loose mounts can bounce, twist, or fall off. If the mount was designed for a different helmet shape or a different kind of light, it may never feel secure enough for regular use.
Overlooking battery access, charging convenience, or water exposure
Think about how often you will need to charge the light and whether the port is easy to reach. If the light is exposed to rain, confirm the manufacturer’s weather-resistance guidance and avoid assuming that “weather resistant” means fully waterproof.
Misplacing lights where they are less visible to drivers
Mounting a light too low, too far back, or under a visor can reduce its value. The goal is to place it where other road users can actually notice it, not where it looks neat in a photo.
Real-World Use: Benefits, Drawbacks, and Best Use Cases
Helmet lights are most useful when riders need to be seen in changing conditions and want the beam to follow their head movement. They are less useful when the helmet is already crowded with accessories or when the rider wants the light to be as light and simple as possible.
Best for commuters, urban riders, delivery riders, and night cyclists
Daily commuters and urban riders often benefit the most because they encounter intersections, traffic, and variable lighting. Delivery riders and night cyclists may also appreciate the extra visibility and directional control, especially in neighborhoods with poor street lighting.
Good if you want a simple visibility upgrade and are willing to follow installation instructions carefully.
Strong fit for commuters who ride in mixed light and want a more noticeable head-level signal.
Useful if you want a refined setup, but you may prefer a lighter, more integrated solution.
Practical trade-offs: weight, runtime, glare, and helmet balance
The main trade-offs are added weight, another device to charge, and the risk of glare if the beam is aimed poorly. A helmet that feels slightly off-balance may be fine for short rides but annoying during longer commutes.
How helmet lights compare with reflective gear and handlebar lights
Reflective gear is passive and low-maintenance, while handlebar lights are stable and help define your bike’s position. Helmet lights add motion and direction, but they work best when combined with the other two rather than treated as a replacement.
| Option | Best For | Key Consideration |
|---|---|---|
| Helmet light | Directional visibility and head-turn signaling | Must be lightweight and helmet-compatible |
| Handlebar light | Stable forward illumination | Does not move with your head |
| Reflective gear | Simple passive visibility | Depends on external light sources |
Care, Storage, and Maintenance for Long-Term Reliability
A helmet light setup lasts longer when you keep the mount clean, the battery healthy, and the charging port protected from dirt and moisture. Small maintenance habits matter because vibration, weather, and sweat can loosen parts over time.
Cleaning tips for mounts, straps, adhesive surfaces, and charging ports
Wipe the helmet shell and mount with a soft cloth and a cleaner that is safe for the helmet material. Keep adhesive surfaces free from oils and dust, and make sure charging ports are dry and free of grit before plugging in.
Battery care, storage temperature, and recharge habits
Follow the light manufacturer’s charging guidance, especially for storage and cold-weather use. Avoid leaving batteries in extreme heat or cold for long periods, and recharge them before they are completely drained if the manual recommends that approach.
Pre-ride inspection checklist for cracks, looseness, and reduced brightness
Before each ride, glance at the shell, straps, mount, and light output. If brightness is noticeably weaker, the mount feels loose, or the helmet has cracks or impact marks, address the issue before riding again.
- Confirm the light is made for helmets or has a helmet-approved mount
- Verify the helmet still fits correctly after installation
- Check standards, weather resistance, and charging access
- Inspect for looseness, cracks, and adhesive wear before each ride
Final Recommendation: Who Should Install Helmet Lights and When It’s Worth It
Helmet lights are worth it for riders who commute in traffic, ride after dark, or want a more noticeable head-level visibility cue. They are less compelling if you only ride in daylight or if your helmet cannot comfortably support an added light without blocking vents or affecting fit.
Best-value setup by rider type and commuting conditions
For most riders, the best-value setup is a lightweight helmet-compatible light combined with standard bike lights and reflective details. That combination usually offers better visibility and less compromise than relying on a helmet light alone.
When to choose a simpler reflective solution instead
If you want the least maintenance, the fewest charging tasks, and the lightest possible helmet, reflective gear may be the better choice. It is also a smart fallback if your helmet shape makes a secure light mount difficult.
Transparent verdict on safety, convenience, and overall value
Helmet lights can be a practical upgrade, but only when they fit the helmet properly, stay secure, and do not interfere with protection or comfort. If a setup feels forced or uncertain, choose a simpler visibility solution and keep the helmet itself as close to its original design as possible.
Frequently Asked Questions
Use a helmet-compatible light or approved mount and follow the manufacturer’s instructions. Do not drill, cut, or otherwise modify the helmet shell or foam.
No. Helmet lights work best as a supplement to handlebar and rear bike lights, not a replacement.
Verify helmet compatibility, mounting method, weight, battery life, weather resistance, and whether the light is meant for front, rear, or side visibility.
They can if they are not approved for the helmet or if removal weakens the shell surface. Check the helmet and light manuals before using adhesive.
Replace the helmet after any crash or impact that may have compromised it, or if installation damages the shell or foam.
Common mistakes include blocking vents, using an incompatible or heavy mount, overlooking charging access, and placing the light where it is hard for others to see.
