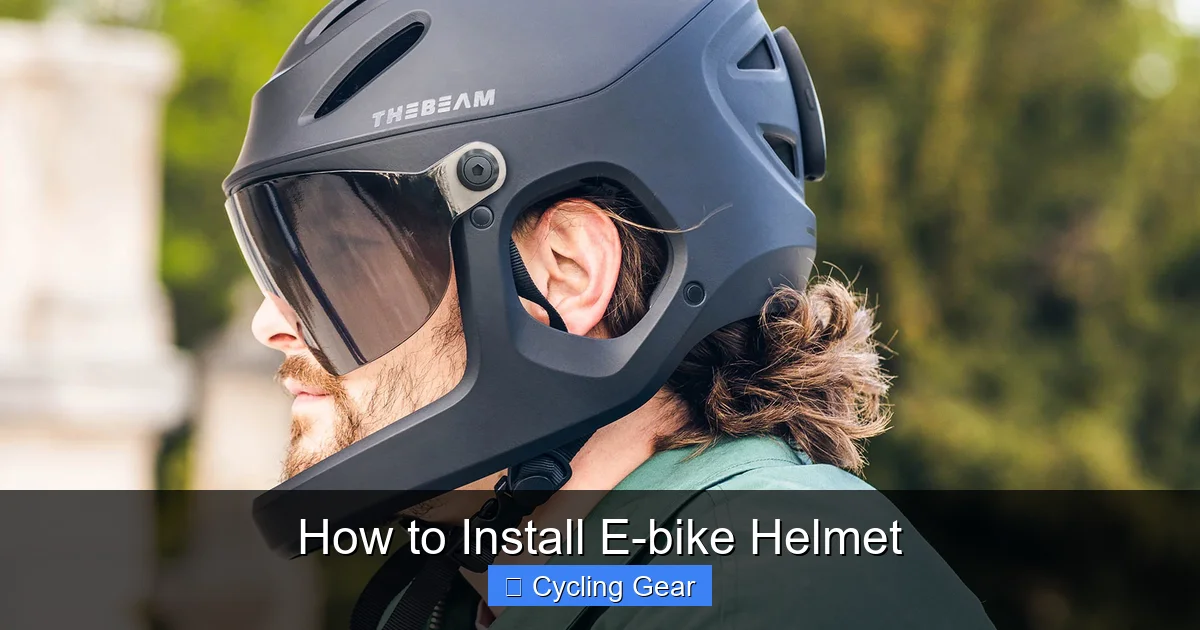
To install an e-bike helmet, place it level on your head, tighten the rear fit system evenly, set the side straps in a V under each ear, and snug the chin strap using the two-finger rule. Before riding, make sure the helmet does not tilt back, slide around, or bounce when you move your head.
If you want real protection from an e-bike helmet, buying it is only half the job. You also need to install it correctly on your head so it sits level, stays secure, and feels comfortable enough to wear on every ride.
This guide from ProKingsEdge walks through how to install an e-bike helmet step by step, plus the common mistakes that can quietly reduce safety. Helmet designs vary by brand and model, so always check the product manual, brand guidance, or a qualified bike shop if anything on your helmet works differently.
- Start with size: A helmet must match your head measurement and shape first.
- Keep it level: The front should sit low enough to protect your forehead.
- Adjust in order: Position shell, tighten rear dial, set straps, then buckle chin strap.
- Check movement: A good helmet stays stable during head turns and bumps.
- Replace when needed: Crashes, cracks, or worn retention parts mean it is time to act.
Why Proper E-bike Helmet Installation Matters in 2026
E-bike riders often move faster than traditional cyclists, especially on paved commutes, bike lanes, and mixed urban streets. That extra speed changes how important stable helmet fit becomes.
A helmet that shifts, tilts back, or bounces over rough pavement may not stay in the right position during a sudden stop or crash. Even a good helmet can underperform if it is worn too high, too loose, or with badly adjusted straps.
How e-bike speeds and urban riding change helmet fit priorities
Many e-bike trips involve stop-and-go traffic, intersections, curbs, potholes, and frequent head checks. That means your helmet needs to stay planted while you look over your shoulder, brake hard, or ride over rough city surfaces.
Urban riders also tend to wear more accessories than casual cyclists. Glasses, earbuds, ponytails, winter caps, and jacket hoods can all affect how a helmet sits and how well the straps lie against the face.
For that reason, e-bike helmet installation is not just about making the helmet feel snug. It is about balancing security, visibility, comfort, and consistency so you will actually wear it correctly every time.
What “installed correctly” actually means for safety and comfort
An e-bike helmet is installed correctly when it sits level on the head, covers the forehead, grips evenly around the skull, and stays stable without painful pressure points. The side straps should form a clean V shape below each ear, and the chin strap should be snug without choking or rubbing.
You should be able to open your mouth comfortably, turn your head, and ride naturally without the helmet rocking around. If it only feels secure when the rear dial is cranked down hard, the fit may be wrong.
A properly installed helmet should feel secure and calm, not painfully tight. Pressure on one spot, forehead headaches, or slipping usually means the size, shape, or adjustment setup needs work.
Choose the Right E-bike Helmet Before You Install It
Before adjusting straps and dials, make sure the helmet itself is a good match for your head and riding style. Installation cannot fully fix a helmet that is the wrong size or wrong shape.
Standard bike helmet vs. e-bike helmet: key protection differences
Some helmets are designed mainly for standard cycling, while others are marketed specifically for e-bike use or higher-speed urban riding. Depending on the model, e-bike helmets may offer deeper coverage around the sides and back of the head, stronger testing standards, integrated lights, or a more commuter-focused design.
That does not mean every regular bike helmet is unsafe for e-bike use. It means you should compare the intended use, certification details, coverage area, and brand guidance before buying. Local laws and class rules can also vary, so check what applies where you ride.
How to measure your head size and match it to the brand’s fit chart
Use a soft measuring tape and wrap it around the largest part of your head, usually about an inch above the eyebrows and around the widest part at the back. Keep the tape level, not angled upward.
Take the measurement two or three times to make sure it is consistent. Then compare that number to the exact brand’s fit chart, because a medium in one helmet may not fit like a medium in another.
If your measurement falls between sizes, read the brand guidance carefully. Some helmets fit rounder heads, some fit narrower heads, and the shape matters almost as much as the number.
If you are between sizes, do not assume the smaller helmet is safer. The best choice depends on shell shape, pad thickness, and how much adjustment range the retention system gives you.
Features worth checking first: MIPS, coverage, visor, lights, and retention system
Before installation, look at the features that affect fit and everyday use. A slip-plane safety system such as MIPS or a similar technology may improve comfort or internal movement management, but it can also slightly change how the helmet feels on the head.
Coverage matters too. Some commuter and e-bike helmets sit lower around the temples and rear of the head. That can feel more secure, but it may interact differently with glasses or jacket collars.
Also inspect the visor, integrated lights, and rear retention system. A simple dial-fit setup is easiest for many riders, while a more adjustable cradle can help if you struggle with pressure points or unusual head shape.
- Certified helmet intended for your riding style
- Head measurement matched to the brand’s chart
- Even internal shape with no painful pressure points
- Rear dial or cradle with enough adjustment range
- Straps that can sit flat below each ear
- Clear compatibility with glasses, caps, or lights if needed
How to Install an E-bike Helmet Step by Step
Once you have the right helmet, installation is straightforward. The goal is to build the fit in the right order so each adjustment supports the next one.
Open the rear fit system and loosen the chin strap before placing the helmet on your head. This helps you find the correct position first instead of forcing the helmet into place.
Set the helmet low enough to protect the forehead, not tilted back like a cap. The front edge should sit level and look balanced from the side.
Tighten the rear dial or cradle until the helmet feels evenly secure around your head. It should not pinch or create one hot spot.
Move the strap splitters so the straps form a V just below each ear. Keep the webbing flat and untwisted.
Tighten the strap so you can fit about two fingers between the strap and the underside of your chin. It should feel secure but still comfortable for speaking and breathing.
Loosen the fit system and position the helmet level on your head
Start by fully loosening the rear dial or fit cradle. Unbuckle the chin strap if it is already closed. Place the helmet on your head so the front edge sits low on the forehead rather than pushed back.
A common rule of thumb is that the front should sit about one to two finger widths above the eyebrows, but the exact look can vary by shell shape. What matters most is that the helmet sits level and covers the front of the head properly.
Adjust the rear dial or cradle for a secure, even hold
Once the shell is level, tighten the rear dial gradually. If your helmet has vertical cradle adjustment, set that first so the rear band cups the back of your head comfortably.
You want an even hold around the head, not a death grip at one point. The helmet should stay in place when you gently shake your head, but it should not leave you feeling squeezed.
If the helmet only feels stable when the dial is very tight, try readjusting the shell position or reconsidering the size. A correct fit starts with the shell shape, then gets refined by the retention system.
Set the side straps into a V shape under each ear
The side straps should meet just below each ear, creating a neat V shape. This helps keep the helmet centered and reduces unwanted movement.
Slide the strap adjusters until both sides look even. Make sure the webbing lies flat against the skin and does not twist. Twisted straps are uncomfortable and can make riders leave the helmet too loose.
Many helmet complaints that seem like “bad fit” are actually strap setup problems. A well-sized helmet can feel much better once the side straps are aligned properly.
Buckle and tighten the chin strap using the two-finger rule
After the side straps are set, buckle the chin strap and shorten it until it feels secure. A widely used check is the two-finger rule: you should be able to fit about two fingers between the strap and your chin.
The strap should not hang loosely below the jaw, but it also should not dig into the throat. Open and close your mouth to make sure the helmet stays stable without causing discomfort.
If the buckle sits against the jawbone, throat, or Adam’s apple area and causes rubbing or pressure, readjust the strap length and side splitters. An uncomfortable buckle often leads riders to loosen the helmet too much.
Test for movement before your first ride
Before riding, do a simple movement test. Try pushing the helmet gently from front to back and side to side. It should move only a little and should not slide far enough to expose the forehead or block vision.
Then shake your head, look down, and simulate a shoulder check. If the helmet shifts noticeably, revisit the shell position, rear dial, and chin strap in that order.
Always follow the product manual or ask a qualified professional if your helmet uses a different adjustment system.
How to Fine-Tune Helmet Fit for Different E-bike Riding Styles
After the basic installation is done, small changes can make a big difference in comfort. This is especially true for daily commuters who wear the helmet for longer periods.
Commuting with glasses, earbuds, ponytails, or winter caps
Glasses should slide in without lifting the helmet or pushing the side straps out of place. If the arms of the glasses fight with the straps, adjust the strap angle first before tightening everything harder.
Earbuds can interfere with strap position and reduce awareness in traffic, so use caution and follow local laws. If you wear your hair in a ponytail, look for a rear cradle position that allows the hair to pass comfortably below or through the fit system if the design allows it.
Thin winter caps may work under some helmets, but thick hats often ruin the fit. If cold-weather riding is common for you, check the product manual, brand guidance, or a qualified professional for compatible cold-weather options.
Adjusting fit for upright city bikes vs. faster Class 3 e-bikes
Riders on upright city bikes often prefer a slightly more relaxed feel, but the helmet still needs to stay level and secure during frequent stops and scans at intersections. Comfort matters because commuters take the helmet on and off often.
On faster Class 3 e-bikes, wind, speed, and longer rides can expose weak fit faster. A helmet that feels “fine” at low speed may start lifting, vibrating, or shifting when pace increases. In those cases, stable shell position and proper strap tension become even more important.
Practical example: dialing in fit for a daily 10-mile commuter
Imagine a rider with a 10-mile daily commute on mixed bike lanes and city streets. They wear clear glasses in the morning, sunglasses in the afternoon, and sometimes a light cap in cooler weather.
The best setup would usually start with a helmet that fits correctly without the cap. Then the rider can adjust the rear cradle to sit comfortably below the occipital bone at the back of the head, set the side straps around the glasses arms, and keep the chin strap snug enough to prevent bounce over rough pavement.
If the cap changes the fit too much, it is better to use a thinner cycling liner or a helmet designed for seasonal commuting rather than forcing the same setup year-round.
Common E-bike Helmet Installation Mistakes That Reduce Protection
Most helmet fit problems come from a few repeat mistakes. They are easy to miss because the helmet may still feel “good enough” in the driveway.
Wearing the helmet too far back or tilted up
This is one of the most common errors. When the front edge sits too high, the forehead loses coverage and the helmet may shift more easily during a crash.
If the helmet looks like a cap balanced on top of the head, it needs to come forward and level out.
Overtightening the rear dial while leaving the chin strap loose
Some riders rely on the rear dial alone and leave the chin strap hanging. That can make the helmet feel tight in one area but still unstable overall.
The rear dial and chin strap do different jobs. The dial helps hold the shell in place, while the chin strap helps keep the helmet on correctly during sudden movement or impact.
Misaligned side straps, twisted webbing, and poor buckle placement
Straps that sit on the ears, twist along the cheeks, or place the buckle against the throat are more than a comfort issue. They often lead riders to loosen the whole system or wear the helmet inconsistently.
Take a minute to flatten the webbing and reposition the splitters. That small adjustment can improve both comfort and security.
Using a damaged helmet or the wrong size to “make it work”
If the shell is cracked, the foam is crushed, the straps are frayed, or the retention system no longer holds adjustment, the helmet may not be safe. Trying to fix a bad fit by adding thick hats, extra pads from another helmet, or extreme strap tension is also risky.
Fit parts and replacement policies vary by brand. Check the product manual, brand guidance, or a qualified bike shop before replacing pads or hardware.
- Level helmet improves forehead coverage
- Proper strap setup reduces shifting
- Balanced tension improves comfort on longer rides
- Correct sizing makes daily use easier
- Wrong size cannot be fully fixed by adjustment
- Loose chin strap reduces stability
- Twisted straps create pressure and rubbing
- Damaged helmets should not stay in service
When to Replace Parts, Upgrade, or Get Expert Help
Even a well-installed helmet does not last forever. Materials wear down, fit systems loosen, and crashes can cause damage that is not always obvious.
Warning signs the retention system, straps, or shell are no longer safe
Watch for a rear dial that slips, cracked or brittle plastic, frayed straps, loose anchors, crushed foam, or shell separation. Any of these can reduce the helmet’s ability to fit and function correctly.
Sweat, heat, sun exposure, and daily commuting all add wear over time. If something looks questionable, stop using the helmet until you confirm what the brand recommends.
After a crash: when replacement is mandatory even if damage looks minor
In general, a helmet should be replaced after a significant impact, even if the outside looks mostly fine. The protective foam can compress internally and may not protect the same way again.
Brand crash replacement policies vary, so check the manual and manufacturer guidance. If you are unsure whether an impact counts, ask a qualified bike shop or helmet specialist instead of guessing.
If you hit your head in a crash and have symptoms like dizziness, confusion, nausea, severe headache, blurred vision, or unusual sleepiness, seek medical care promptly. Helmet fit helps reduce risk, but it does not prevent all injuries.
When a bike shop or helmet specialist should check your fit
Get expert help if you cannot stop the helmet from rocking, if you are between sizes, if you have persistent pressure points, or if accessories keep interfering with the straps. A good shop can often spot a fit issue in seconds.
This is also smart for riders upgrading to a faster e-bike, changing riding style, or buying a helmet online without trying it on first.
If a helmet causes ongoing headaches, jaw pain, skin irritation, or pressure after careful adjustment, talk to your doctor or a qualified professional. Those symptoms may point to a fit issue, a sensitivity, or another health concern worth checking.
Cost, Value, and Fit Comparison: What Riders Can Expect
Helmet prices vary a lot, but better fit features can be worth paying for if you ride often. The cheapest option is not always the best value if it is uncomfortable or hard to adjust.
Budget, mid-range, and premium e-bike helmets compared by fit features
Budget helmets often include basic dial adjustment, fixed strap splitters, and fewer comfort options. They can work well if the shell shape matches your head, but the fit range may be less forgiving.
Mid-range helmets usually add better padding, easier strap adjustment, more refined retention systems, and commuter-friendly features like lights or visors. Premium models may offer lighter construction, more advanced safety systems, and a wider range of fit tuning.
| Option | Best For | Note |
|---|---|---|
| Budget | Occasional riders and short commutes | Basic fit features; shape match matters more |
| Mid-range | Regular commuters | Usually the best balance of comfort and adjustability |
| Premium | Frequent riders and faster e-bike use | Often adds better tuning, comfort, and integrated features |
Which adjustments are standard and which extras improve comfort and safety
Standard features usually include a rear dial, chin buckle, and adjustable side straps. Extras may include vertical cradle adjustment, magnetic buckles, integrated lights, anti-odor padding, winter pad kits, or advanced impact-management systems.
These extras do not automatically make a helmet safer for you. They help only if the helmet still fits your head shape and your daily riding needs.
Why the cheapest helmet can cost more if the fit is wrong
A low-cost helmet that pinches, slides, or fights with your glasses may end up unused. Then you may buy a second helmet anyway, which costs more than getting a better-fitting option the first time.
For many e-bike riders, the best value is the helmet that fits correctly, adjusts easily, and feels comfortable for your actual commute.
Final Checklist for Installing an E-bike Helmet Correctly Every Ride
The best helmet setup is the one you can repeat quickly and correctly before every ride. A short pre-ride check helps catch strap changes, loose dials, or a helmet that got bumped out of position.
A quick pre-ride fit check you can do in under 30 seconds
Put the helmet on and confirm five things: it sits level, covers the forehead, the rear dial is snug, the side straps form a V under each ear, and the chin strap passes the two-finger test.
Then give the helmet a gentle push front to back and side to side. If it shifts too much, fix it before you roll out.
- Helmet sits level, not tilted back
- Front edge protects the forehead
- Rear dial feels snug but not painful
- Side straps form a V below each ear
- Chin strap is secure using the two-finger rule
Ryan Mitchell’s recap: the safest fit for comfort, visibility, and all-day riding
The safest e-bike helmet fit is simple: level on the head, evenly snug all around, straps neat and balanced, and secure enough that the helmet does not wander when you move. If it is comfortable, you are much more likely to wear it properly every ride.
Do not force a bad helmet to work. If the size, shape, or hardware is fighting you, check the product manual, brand guidance, or a qualified professional and make the change before your next commute.
Common Questions
How low should an e-bike helmet sit?
It should sit level and low enough to cover your forehead. If it looks like a cap pushed back, it is too high.
What is the two-finger rule?
It means you should fit about two fingers between the chin strap and your chin. That usually gives a secure but comfortable fit.
Should the side straps touch my ears?
No. They should form a V shape just below each ear without rubbing or folding over the ear.
Can I just tighten the rear dial and skip strap adjustment?
No. The rear dial helps with fit, but the straps help keep the helmet positioned correctly and secure.
Is a loose helmet okay for short rides?
No. Even short commutes can include sudden stops, rough pavement, or crashes, so proper fit matters every ride.
Frequently Asked Questions
How should an e-bike helmet sit on your head?
An e-bike helmet should sit level on your head and low enough to protect the forehead. It should feel evenly snug, not perched high or tilted back.
How tight should the chin strap be on an e-bike helmet?
The chin strap should be snug enough that you can fit about two fingers between the strap and your chin. It should not hang loose, but it also should not press into your throat.
Can I wear a hat under my e-bike helmet?
A thin cap may work with some helmets, but a thick hat often changes the fit too much. Check the product manual, brand guidance, or a qualified professional before adding layers under the helmet.
Do I need a special helmet for an e-bike?
Not always, but some riders prefer e-bike-specific helmets for extra coverage, commuter features, or higher-speed use. The right choice depends on your riding style, local rules, and the helmet’s intended use.
Should I replace my e-bike helmet after a crash?
Yes, replacement is usually the safest option after a significant impact. Damage is not always visible, and the protective foam may already be compromised.
What if my helmet still feels uncomfortable after adjustment?
That often means the size or shell shape is not right for your head. Try the brand’s fit guidance or ask a qualified bike shop or helmet specialist to check the fit.
